EDIUS 7 Online Help
Reference ManualHardware Setup Guide
Installation Manual
User Guide
The following explains how to capture and import from DV tape or DirectShow base web cameras, and how to capture analog sources.
You can import sources in HDV or DV format by simple operation.
Connect your PC to the camera, and import HDV and DV standard sources recorded on DV tape using the codec that was set when the device preset was registered.
 Note
NoteConnection information, video format and other information when importing sources for Grass Valley products, cameras, decks, and other external devices used for importing sources must be registered in advance as device presets.
The [Select Input Device] dialog box appears, and the list of device presets registered in system settings is displayed.
 Alternative
Click [Capture] on the menu bar, and click [Device Preset Name] to display the device preset.
Click the device preset name ([Input Preset 1] to [Input Preset 8]) to display the device preset. (By default, [Input preset 2] to [Input Preset 8] are not displayed. Before performing the operation, set to display the buttons in the preview window.)
Displaying the device preset assigned to the input preset 1: [F2]
Displaying the device preset assigned to the input preset 2: [F3]
Displaying the device preset assigned to the input preset 3: [F4]
To set a reel name, uncheck [UserBit is used as a Reel No.] and enter a reel name. You can also select previously entered reel names from the list.
The camera can now be operated by the Player operation buttons.
Playback with Player Operation Buttons

If you click a timecode in [Cur] on the Player, the [TC Jump] dialog box appears. Enter the timecode in [Destination] and click [Jump] to display the frame of the specified timecode.
NoteIf the HDV camera is not recognized, check the items in [Sound, video and game controller] on the Device Manager. The camera is recognized correctly on Windows if the device name is displayed. If it is not recognized, check that Windows is updated, and that the HDV camera is set to the HDV fixed mode (HDV-DV conversion is off).
When the source has been captured in MPEG TS format, the information of the preset reel name will not be recorded to the captured source file but to the project file. The information of the reel name set at capture will not be reflected even if that source file is opened in another project file after EDIUS is restarted.
There are other ways of specifying the range to capture.
How to Specify the Capture Range
To capture only the video part, click the [Set In Point] list button on the Player, and click [Set Video In] to set the In point. To set the Out point, click the [Set Out Point] list button on the Player, and click [Set Video Out Point].
To capture only the audio part, click the [Set In Point] list button on the Player, and click [Set Audio In Point] to set the In point. To set the Out point, click the [Set Out Point] list button on the Player, and click [Set Audio Out Point].

Capturing starts. The [Capture] dialog box appears, and capturing ends automatically at the Out point.
To stop the capture midway, click [Stop].
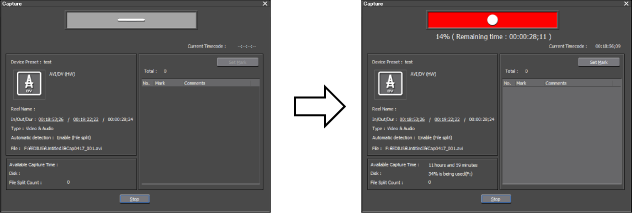
The clip is registered to the bin.
AlternativePress [F9] on the keyboard after step 5.
Click the [Capture] list button on the Player, and click [Video and Audio].
Only the video part or audio part is captured when the [Capture] list button on the Player is clicked and [Video Only] or [Audio Only] is selected.
Click [Capture] on the menu bar, and click [Capture].
Click [Capture] on the menu bar, and click [Video Capture] or [Audio Capture].
Files can be automatically divided at capture.
During capture, you can add a marker with a comment to the source clip.
The batch capture function is supported only on models that can acquire the timecode. Some models may not support timecodes.
To change a reel name midway, for example, when swapping tapes, click [Capture] on the menu bar, and click [Reel No. Settings].
For EDIUS Elite, another EDIUS client on the same network can perform edit while recording by importing the captured data, when capturing sources in AVI or MXF format.
NoteWhen the source has been captured in MPEG TS format, the information of the preset clip marker will not be recorded to the captured source file but to the project file. The information of the clip marker set at capture will not be reflected even if that source file is opened in another project file after EDIUS is restarted.
There are six ways as follows to specify the capture range (between In and Out points) in steps 5 to 6.
The timecode that is given priority at capture from among the timecodes at [In], [Out] and [Dur] on the Player is underlined.
Capture starts when [Capture] is clicked without specifying the In and Out points, and ends when [Stop] is clicked.
Timecode display on the Player:

Specify the In/Out points.
Timecode display on the Player:

Specify the In point, then click the timecode in [Dur] on the Player, enter the duration, and press [Enter] on the keyboard.
*This method is used, for example, to capture from a tape of free run recordings with non-continuous timecodes.
Timecode display on the Player:

Capture ends when [Stop] is clicked after only the In point is specified.
Timecode display on the Player:

Specify only the Out point, rewind to the capture start position, and click [Capture].
Timecode display on the Player:

Click the timecode at [Dur] on the Player without specifying the In and Out points, enter the duration, and press [Enter] on the keyboard. Click [Capture] to start capturing.
*This method is used, for example, to capture a line recording for a specified duration of time.
Timecode display on the Player:

In the case of an In/Out capture or In/Dur capture, the timecode to give priority to can be changed to a duration or Out point by clicking the [Out] or [Dur] letter on the Player.
All timecodes that have been set can be deleted by right-clicking the timecodes at [Dur] and clicking [Clear].
Capture stereoscopic sources where the L side and the R side are recorded separately, using the batch capture function.
To capture stereoscopic sources, register compatible device preset in advance. Select [Separate L/R Clips] from the [Stereoscopic] list in the [Input H/W, Format Settings] screen for device presets.
Importing Sources All Together (Batch Capture)
After 9 or 10, the [Individual L/R capture] dialog box appears for each item of the batch capture list.
[Individual L/R capture] Dialog Box
Capturing starts in the order of the L side source and the R side source, and the progress is displayed in [Status] of the [Batch Capture] dialog box. When capturing ends, the stereoscopic clip is registered to the bin.
If only the audio part in a stereoscopic source is batch captured, the WAV file will be created.
|
[How to capture R clip]
|
Select whether to capture the R side source from the same tape as the L side source, or to capture from another tape. To capture from the same tape, enter a timecode in [IN Offset]. |
|
[File Name]
|
Set a suffix for file names of the L side and the R side. |
Analog sources stored on video tape or similar device can be imported via a Grass Valley product, Bay and A/D converter.
NoteWhen analog sources are imported from an analog device or device connected by the HDMI terminal, the device cannot be controlled from EDIUS.
Connection information, video format and other information when importing sources for Grass Valley products and other external devices used for importing sources must be registered in advance as device presets.
The [Select Input Device] dialog box appears, and the list of the device presets registered in the system settings is displayed.
AlternativeClick [Capture] on the menu bar, and click [Device Preset Name] to display the device preset.
Click the device preset name ([Input Preset 1] to [Input Preset 8]) to display the device preset. (By default, [Input preset 2] to [Input Preset 8] are not displayed. Before performing the operation, set to display the buttons in the preview window.)
Displaying the device preset assigned to the input preset 1: [F2]
Displaying the device preset assigned to the input preset 2: [F3]
Displaying the device preset assigned to the input preset 3: [F4]
To set a reel name, uncheck [UserBit is used as a Reel No.] and enter a reel name. You can also select previously entered reel names from the list.
Capturing starts.
AlternativePress [F9] on the keyboard after step 5.
When capturing is stopped, the captured clip is registered to the bin.
You can import sources from devices such as DirectShow-based web cameras or microphones.
NoteConnection information and other information for web cameras or microphones used for importing sources must be registered in advance as device presets.
The [Select Input Device] dialog box appears, and the list of the device presets registered in the system settings is displayed.
AlternativeClick [Capture] on the menu bar, and click [Device Preset Name] to display the device preset.
Click the device preset name ([Input Preset 1] to [Input Preset 8]) to display the device preset. (By default, [Input preset 2] to [Input Preset 8] are not displayed. Before performing the operation, set to display the buttons in the preview window.)
Displaying the device preset assigned to the input preset 1: [F2]
Displaying the device preset assigned to the input preset 2: [F3]
Displaying the device preset assigned to the input preset 3: [F4]
To set a reel name, uncheck [UserBit is used as a Reel No.] and enter a reel name. You can also select previously entered reel names from the list.
Capturing starts.
AlternativePress [F9] on the keyboard after step 3.
When capturing is stopped, the captured clip is registered to the bin.
NoteThe source settings, such as bitrate or frame size, vary depending on your device.
