EDIUS 7 Online Help
Reference ManualHardware Setup Guide
Installation Manual
User Guide
You can drag the timeline cursor forwards and backwards and move to the position to confirm on the timeline.
The timeline cursor moves, and its frame is displayed on the Recorder.

When Recorder-related operations are being performed in the dual mode, a blue line is displayed around the Recorder.
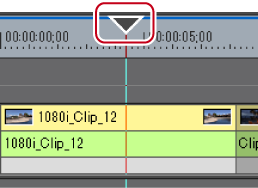
When the start frame of the timeline is displayed, a white triangle is displayed in the upper left corner.

You can play back or move clips in individual frame units by using the operation buttons on the Recorder.
Playback with Player Operation Buttons
Playback starts on the Recorder.
Playback stops.
 Alternative
Playing back Recorder: [Enter]

|
(1)
|
[Set In]
|
Set the In point to any position on the timeline. [I]
|
|
(2)
|
[Set Out]
|
Set the Out point to any position on the timeline. [O]
|
|
(3)
|
[Stop]
|
Stop playing back the timeline. [K], [Shift] + [↓]
|
|
(4)
|
[Review]
|
Rewind the timeline. Each click switches the playback speed in the reverse direction between 4 times and 12 times. [J]*1
|
|
(5)
|
[1 Frame Back]
|
Each click rewinds the timeline one frame at a time in the reverse direction. Keeping this button clicked plays back the source at the same speed in the reverse direction. [←]
|
|
(6)
|
[Play]
|
Play the timeline in the forward direction. When this button is clicked during playback, playback pauses. Click again to restart playback. [Enter], [Space]
|
|
(7)
|
[Next Frame]
|
Each click advances the timeline one frame at a time in the forward direction. Keeping this button clicked plays back the source at the same speed in the forward direction. [→]
|
|
(8)
|
[Fast Forward]
|
Fast forward the timeline. Each click switches the playback speed in the forward direction between 4 times and 12 times. [L]*2
|
|
(9)
|
[Loop]
|
Repeat playback between In and Out points of the timeline. If no In point has been set, playback is repeated from the beginning of the timeline, and if no Out point has been set, playback is repeated until the end of the timeline. The entire timeline can also be played back as a loop. [Ctrl] + [Space]
|
|
(10)
|
[Move to Previous Edit Point]
|
Move the timeline cursor to the edit point (e.g. the border of clip, In and Out points of the timeline) at the left side of the timeline cursor position. [A], [Ctrl] + [←]
|
|
(11)
|
[Next Edit Point]
|
Move the timeline cursor to the edit point at the right side of the timeline cursor position. [S], [Ctrl] + [→]
|
|
(12)
|
[Play the Current Area]
|
Play back the area before and after the timeline cursor. |
|
(13)
|
[Export]
|
Display output (import) related menus. |
*1Each press of [J] on the keyboard switches the rewind speed in 6 levels between 2 to 32 times. Press [L] to slow down the rewind speed. Press this key with the source paused to play back at the same speed in the reverse direction.
*2Each press of [L] on the keyboard switches the fast-forward speed in 6 levels between 2 to 32 times. Press [J] to slow down the fast-forward speed. Press it while pausing to play back at the same speed in the forward direction.
When playback processing is slow, try the following operations.
Click [Play] with [Shift] on the keyboard held down. (Playback is performed after the data is temporarily stored in the playback buffer. The playback buffer can be changed by [Application] in [System Settings] → [Playback].)
Render clips or a part of the timeline.
To move the timeline cursor to the start and end of the timeline, press [Home] and [End] on the keyboard, respectively.
Moving 10 frames back: [Shift] + [←]
Moving 10 frames forward: [Shift] + [→]
You can play back a clip by dragging the shuttle or slider on the Recorder.
A frame at the slider position is displayed on the Recorder.
AlternativeShuttle (fast forward)*1: [Ctrl] + [L]
Shuttle (rewind)*2: [Ctrl] + [J]
*1Each click of [Ctrl] + [L] on the keyboard switches the fast-forward speed in 12 levels between 1/16 to 32 times. Press [Ctrl] + [J] on the keyboard to slow down.
*2Each click of [Ctrl] + [J] on the keyboard switches the rewind speed in 12 levels between 1/16 to 32 times. Press [Ctrl] + [L] on the keyboard to slow down.

|
(1)
|
Shuttle
|
Drag the shuttle to the left and right to play back in the reverse and forward directions, respectively. Release dragging to return the shuttle to the center and pause playback. The playback speed can be selected in 21 levels both in the forward and reverse directions, from 1/20 to 16 times. |
|
(2)
|
Sliders
|
Click any position on the position bar to move the slider and display the frame for that position. You can also drag the slider. |
|
(3)
|
Position bar
|
Indicates the timeline on the Recorder. |
You can play back a clip by moving the mouse on the Recorder.
Draw the circle clockwise to playback in the forward direction, and counterclockwise in the reverse direction. The playback speed changes in proportion to the speed of the mouse action.
 Alternative
Place the mouse cursor on the Recorder, and rotate the mouse wheel.
Repeat playback between In and Out points of the timeline.
Setting the In and Out Points on the Timeline

Playback is repeated between In and Out points of the timeline.
Playback starts from the current position of the timeline cursor.
AlternativeLoop playback: [Ctrl] + [Space]
Playback stops.
You can play back the area around the timeline cursor.

You can repeatedly play back the area around the timeline cursor.
Playback stops.
You can also play back around the nearest cut point placed before the timeline cursor for the specified duration. Click the [Play the Current Area] list button, and click [Play around Cut Point (1 Sec)], [Play around Cut Point (2 Sec)] or [Play around Cut Point (3 Sec)].
You can set the preliminary operation time (Preroll) at [Preview] in [User Settings] → [Playback].
