
When [Speed] or [Time Remap] is set, menu items to be displayed when each item is set is checked.
|
|
|---|
|
You can change the playback speed of clips.
1) Right-click a clip, and click [Time Effect] → [Speed].
The [Speed] dialog box appears.
 Alternative
Click [Clip] on the menu bar, and click [Time Effect] → [Speed].
Changing the speed of the whole clip: [Alt] + [E]
2) Set each item and click [OK].
An orange line is displayed on clips whose speed has been changed.
The speed of multiple clips placed on separate clips can be changed in a single operation. A message is displayed if the speed change cannot be set depending on the combination of clips.
|
|
|---|
|
|
[Speed] |
[Direction] Select the playback direction of the clips. [Rate] Enter the ratio to the original speed (100%). Since the speed is changed referenced to the In point, when [Change the Clip Duration on Timeline] is unchecked, the upper limit of Rate that can be entered changes according to the margin on the Out point side of the source clip. When there is no margin on the Out point side, a Rate greater than 100% cannot be entered. |
|
[Change the Clip Duration on Timeline] |
Check this item to change the duration of clips on the timeline according to the speed (value of [Rate]) of the clip. The duration of the clip can be entered at [Duration] to change the speed. When this item is unchecked, the speed can be changed without changing the duration of the clip on the timeline. |
|
[Field Option] |
The [Field Option] dialog box appears. |
You can alter the speed of any part of a clip.
You can remap a particular frame of a clip to a different position of the timeline. The remaining frames are automatically interpolated, and as a result the speed of the previous/next frames is changed. The In point of a clip, the frame of the Out point and the overall length remain unchanged.
1) Right-click a clip, and click [Time Effect] → [Time Remap].
The [Time Remap] dialog box appears.
Alternative
Click [Clip] on the menu bar, and click [Time Effect] → [Time Remap].
Partially changing playback speed: [Shift] + [Alt] + [E]
2) Drag the timeline cursor.
3) Click [Add Key / Delete] at the position to add a key.
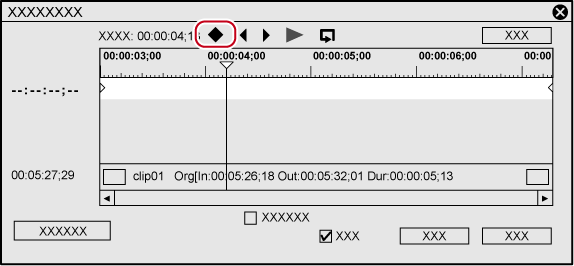
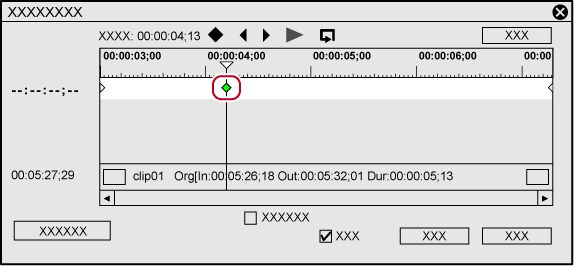
The key is added in the key setting field.
 Alternative
Right-click the [Time Remap] dialog box and click [Add Key] to add a key to the position of the timeline cursor.
Right-click the [Time Remap] dialog box and click [Delete Key] to delete the key from the position of the timeline cursor.
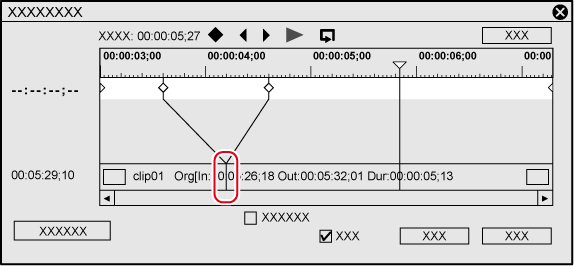
4) Move the mouse cursor over the key, and drag to the left or right.
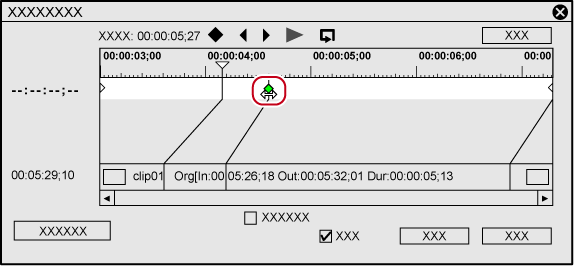
The frame of the clip also can be dragged to the left or right.
 Alternative
Moving the timeline cursor to the top frame of the clip: [Home]
Moving the timeline cursor to the last frame of the clip: [End]
Moving the timeline cursor to the previous frame: [←]
Moving the timeline cursor to the next frame: [→]
Moving key/frame to 1 frame before: [,] (This is enabled when the key setting field or a clip is focused, and the timeline cursor is moved to the key or the frame.)
Moving key/frame to 1 frame behind: [.] (This is enabled when the key setting field or a clip is focused, and the timeline cursor is moved to the key or the frame.)
Focusing on the key setting field: [↑]
Focusing on the clip: [↓]
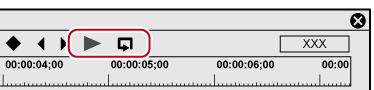
5) Click [Playback] or [Loop Playback] to check the video.
The video is displayed on the Recorder.
When you right-click the [Time Remap] dialog box and click [Information] to uncheck, the thumbnail displayed at the top and end of the clip, and the timecode can be set to hidden.
When you right-click the [Time Remap] dialog box and click [Timeline Time] to uncheck, the top frame of the clip can be changed to “00:00:00;00”.
When you right-click the [Time Remap] dialog box and click [Original Source Time] to uncheck, the timecode that takes the In point of the clip as “00:00:00;00” is displayed.
Even clips with no key added are set with one key each at the beginning and end.
As the default time remap setting, the speed of set keys onward is changed smoothly. If you want to maintain a fixed playback speed in a certain range, set the key to that range, right-click the key on the In point side, and click [Linear]. The key changes shape from diamond-shaped to square.
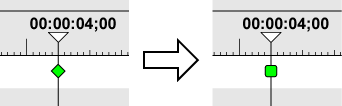
If you right-click a key set with linear change and click [Speed], a dialog box for entering the playback speed appears.
|
(1) |
Key frame edit buttons |
Add: [Insert], [V] Delete: [Delete] |
|
[Page up], [A], [Ctrl] + [←] |
||
|
[Page down], [S], [Ctrl] + [→] |
||
|
|
||
|
|
||
|
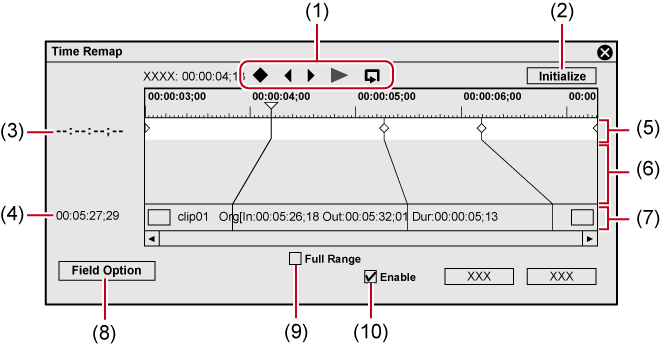
(2) |
[Initialize] |
Click [Initialize] and click [Yes] to delete all added keys and restore the defaults. |
|
(3) |
Timecode (Timeline) |
Directly enter the value to specify which place on the timecode of the timeline the key at the timeline cursor position is to be placed. The timecode is displayed when the timeline cursor is moved to the key. |
|
(4) |
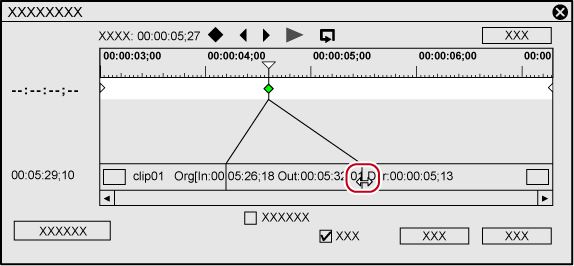
Timecode (Clip) |
Directly enter the value to specify which place on the timecode of the clip the key at the timeline cursor position is to be placed. |
|
(5) |
Key setting field |
This space is used for setting the key. A green line is displayed at parts where the speed has not been changed. |
|
(6) |
Time difference display area |
This space displays the values of the time difference that occurs when keys are added as a connected line. |
|
(7) |
Clips |
Display the line connecting the key and the corresponding frame on a position on the clip. |
|
(8) |
[Field Option] |
The [Field Option] dialog box appears. |
|
(9) |
[Full Range] |
Display all margin sections of the clip. Checking this item when trimming or a cut operation has been performed after setting the time remap can display the keys of the cut section. |
|
(10) |
[Enable] |
Switch the enable/disable setting for the time remap setting. Uncheck this item to disable the setting. |
Stop and play back the In or Out points of the clip. Clips can be stopped for not just the length of the clip but also the first half or second half from a desired frame.
|
|
|---|
|
Any desired range of clips can also be frozen by time remap. Add keys to determine the range to freeze, and move to the position to stop the 2 key frames on the clip side.
1) Right-click a clip, and click [Time Effect] → [Freeze Frame] → [Setup].
Alternative
Click [Clip] on the menu bar, and click [Time Effect] → [Freeze Frame] → [Setup].
2) Check [Enable freeze frame] in the [Freeze Frame] dialog box.
3) Select the fix position, and click [OK].
When the In point is selected, the frame of the In point is freeze-framed for the length of the clip, and when the Out point is selected, the frame of the Out point is freeze-framed for the length of the clip.
When a clip set with freeze frame enabled is trimmed, operation changes as follows depending on the fix position.
When the In point side of a clip with a fixed In point is trimmed, the displayed frame also moves matched to the trimming. Operation is not affected when the Out point side has been trimmed.
When the Out point side of a clip with a fixed Out point is trimmed, the displayed frame also moves matched to the trimming. Operation is not affected when the In point side has been trimmed.
1) Move the timeline cursor to the frame to freeze.
2) Right-click a clip, and click [Time Effect] → [Freeze Frame] → [Before Cursor] or [After Cursor].
The selected clip is cut at the timeline cursor position, and freeze frame is set to clips before or after the cursor. When freeze frame has been set after a cursor, the fix position becomes the In point, and when freeze frame has been set before a cursor, the fix position becomes the Out point.
Alternative
Click [Clip] on the menu bar, and click [Time Effect] → [Freeze Frame] → [Before Cursor] or [After Cursor].
|
|
|---|
|
You can set processing options for reducing flicker, for example, when slow motion has been set.
1) Select a clip.
Multiple clips can be selected and set in a single operation.
2) Click [Clip] on the menu bar, and click [Time Effect] → [Field Option].
The [Field Option] dialog box appears.
Alternative
Right-click a clip and click [Time Effect] → [Field Option].
3) Set each item and click [OK].
|
[Processing Option] |
Set the processing option to reduce flicker during slow motion. Set [Deinterlace when speed is below 100%] when video is affected by the scanning line and flickers when a slower playback speed has been set. |
|
[Use nearest neighbor] |
Check this item to interpolate the length of the clip by continuously displaying the same frame. |


 : Add a key at the position of the timeline cursor. If a key is placed at the position of the timeline cursor, the key is deleted.
 : Move the timeline cursor to the previous key.
 : Move the timeline cursor to the next key.
 : Play back the clip from the position of the timeline cursor to the end of the clip. When it is clicked during playback, playback pauses.
 : Repeatedly play back the clip. When it is clicked during playback, playback pauses.