Creating a Proc Amp Device
REQUIREMENT: |
Before beginning this procedure, make sure you have opened the iControl—Services management page ( click HERE). |
1. On the iControl—Services management page, verify that the Virtual Service Manager is active (green).
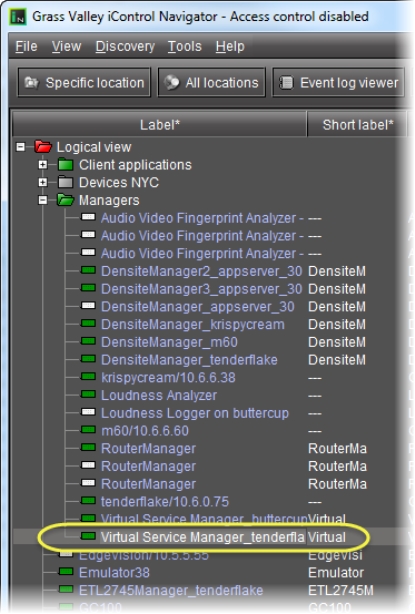
3. Click the Logical view tab.
NOTE: Make sure that the Virtual Service Manager is visible. |
4. Double-click the Virtual Service Manager row.
[ Graphic ]
System Response: The Virtual Service Manager control panel appears, with the first of three pages (Type) displayed.
5. Select Proc amp, and then click Next.
System Response: The Configuration page appears.
[ Graphic ]
6. Type a logical path — this corresponds to the iC Navigator folder in which the new proc amp will appear. If the folder does not exist, a new one will be created automatically.
7. In the Proc amp name field, type a name for the proc amp.
8. Click Next.
System Response: The Initialization page appears.
System Response: The Virtual Service Manger detects the compatible Imaging-series cards that are available on the network (i.e. visible in iC Navigator), and populates the drop-down menus with their labels.
NOTE: The menus may contain cards with identical labels. Currently, the only way to tell the difference is by comparing the order of the cards in the menus with their order in iC Navigator. |
9. Choose any combination of video proc amp cards, audio proc amp cards, and/or audio delay cards to be used to build the new proc amp.
10. Click Add.
System Response: After a few seconds, the new proc amp appears in the iC Navigator window in its designated folder (only visible in Logical view).
11. Double-click the new proc amp in the iC Navigator window.
System Response: The proc amp virtual control panel appears, with gains (controls) determined by the card type.