EDIUS 7 Online Help
Reference ManualHardware Setup Guide
Installation Manual
User Guide
You can perform trimming while still in the standard mode by selecting and dragging a cut point. The edit result of trimming is dependent on the edit mode.
The trimming type changes according to how the In and Out points are selected and keyboard combinations.
For details on respective trimming methods, see the respective page.
The cut point for each trimming type is selected as follows:
|
In point trim
|
Click the In point of the clip. |
|
Out point trim
|
Click the Out point of the clip. |
|
Ripple trim
|
Click [Shift] + In point or Out point. |
|
Ripple trim (split)
|
Click [Alt] + [Shift] + In point or Out point. |
|
Slide trim
|
Click [Ctrl] + [Shift] + In point or Out point. |
|
Slide trim (split)
|
Click [Ctrl] + [Alt] + [Shift] + In point or Out point. |
|
Split trim
|
Click [Alt] + In point or Out point. |
|
Slip trim
|
Click [Ctrl] + [Alt] + center of the clip. |
|
Rolling trim
|
Click [Ctrl] + [Shift] + center of the clip. |
|
Transition trim
|
Click the In or Out point of transition (clip transition, track transition)/audio cross fades. |
|
Transition trim (both edges)
|
Click [Shift] + clip transition/audio cross fade. |

Ripple trimming is also possible with the ripple mode off.
Adjust the range to be used while checking the video displayed on the preview window.
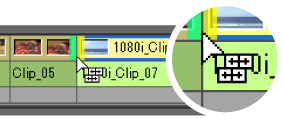
The mouse cursor changes shape according to the trim mode.
|
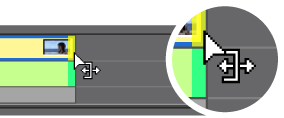
In point trim/Out point trim
|
 |
|
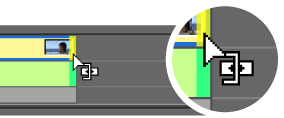
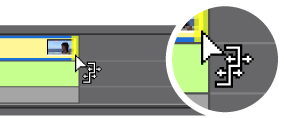
Ripple trim
|
 |
|
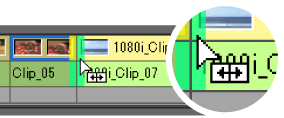
Ripple trim (split)
|
 |
|
Slide trim
|
 |
|
Slide trim (split)
|
 |
|
Split trim
|
 |
|
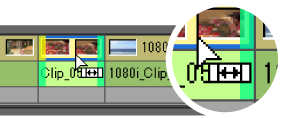
Slip trim
|
 |
|
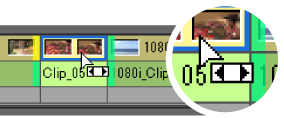
Rolling trim
|
 |
|
Transition trim
|
 |
|
Transition trim (both edges)
|
You can perform trimming by dragging the mouse on the preview window in the trim mode.
 Note
NoteThe trim mode (transition) is not available in the preview window.
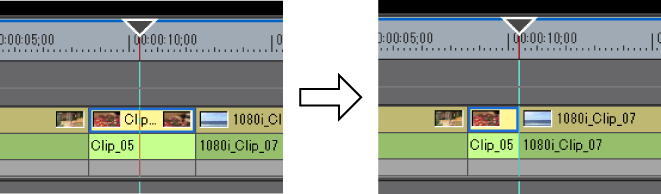
The preview window switches from the standard mode to the trim mode.

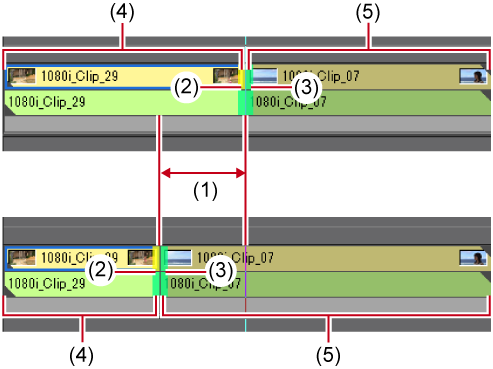
The cut point changes color to green or yellow, and trimming is enabled.
Adjust the range to be used while checking the video displayed on the preview window.
The mouse cursor changes shape according to the trim mode.


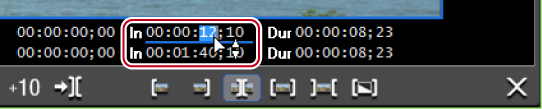
In the trim mode, the sequence timecode and the source timecode are displayed in the preview window, and you can execute trimming by entering numerical values.
The preview window switches from the standard mode to the trim mode.
The cut point changes color to green or yellow, and trimming is enabled.
Move the mouse cursor to the timecode at the bottom of the trim window, and the mouse cursor changes shape. If you click in this state, a blue line is displayed under the timecode and numerical values can be entered.
Adjust the range to be used while checking the video displayed on the preview window.

The upper level is the timecode of the sequence, and the lower level is the timecode of the source. Numerical values can be entered in either level for trimming.
*The items displayed may differ depending on the size of the preview window.
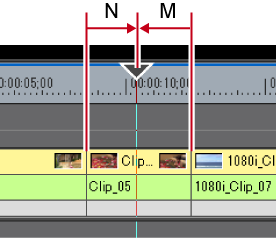
Slide trimming
The In and Out point sides of the timeline cursor can be trimmed by shortcut keys.
You can perform trimming from the In point up the timeline cursor by [N] on the keyboard and from the timeline cursor up to the Out point by [M].The trimming type changes according to the keyboard combination.
You can also perform trimming on a selected transition (clip transition, track transition) and audio cross fades. To trim a track transition, select the mixer.
|
In point trim
|
[N] |
|
Out point trim
|
[M] |
|
Ripple trim (In point side)
|
[Alt] + [N] |
|
Ripple trim (Out point side)
|
[Alt] + [M] |
|
Slide trim (In point side)
|
[Ctrl] + [Alt] + [N] |
|
Slide trim (Out point side)
|
[Ctrl] + [Alt] + [M] |
|
Split trim (In point side)
|
[Shift] + [N] |
|
Split trim (Out point side)
|
[Shift] + [M] |
Ripple trimming is also possible with the ripple mode off.
When the Out point side of the clip has been trimmed by slide trim ([Ctrl] + [Alt] + [M])