EDIUS 7 Online Help
User GuideReference Manual
Hardware Setup Guide
Installation Manual
You can export a project as a disc image file to be written to DVD or BD. You can create title and chapter menus, as well as set the background of the menu screen and buttons displayed on the screen.

The [Burn to disc] dialog box appears.
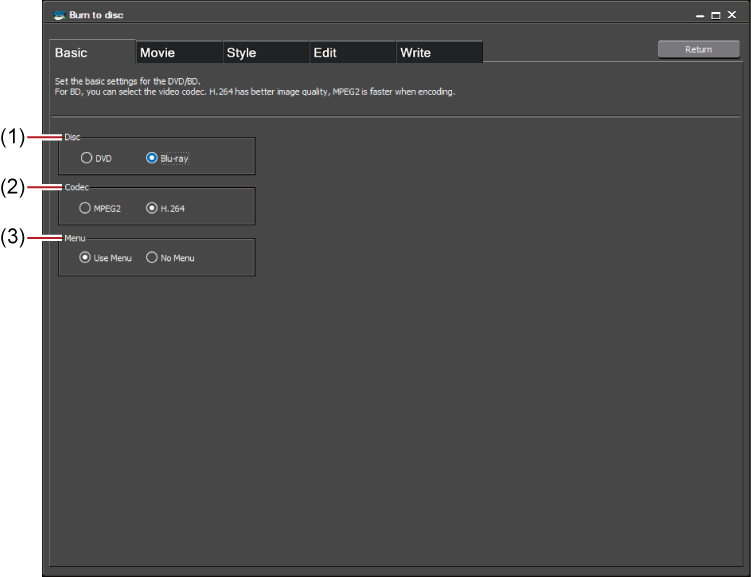
Configure the basic settings of the disc to be created.
|
(1)
|
[Output]
|
Select the type of disc to be exported to from the list. |
|
(2)
|
[Codec]
|
When exporting to BD, select the codec. |
|
(3)
|
[Menu]
|
Check this item to create a disc with a menu screen. |
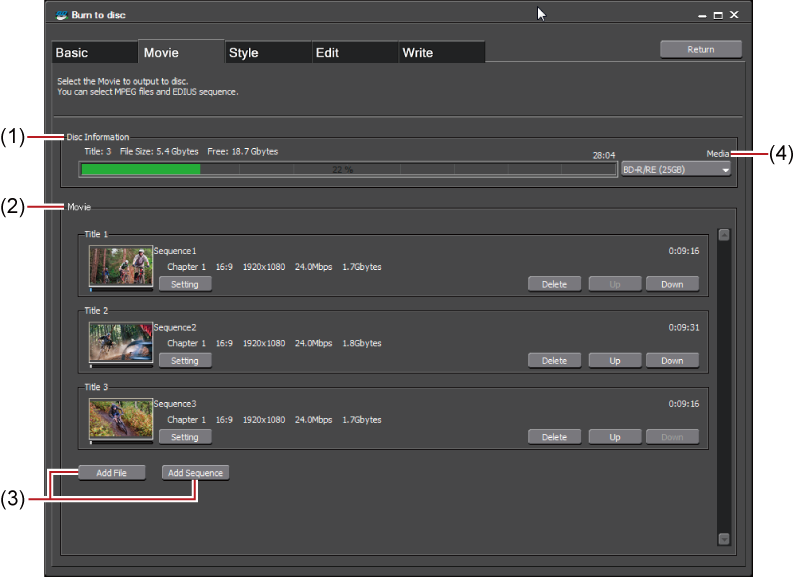
You can add files and sequences while checking the disc free space.
|
(1)
|
[Disc Information]
|
Display the number of the added titles, file size, and available disc space. |
|
(2)
|
[Movie]
|
Display the added titles. |
|
(3)
|
[Add File]/[Add Sequence]
|
Add files/sequences. |
|
(4)
|
[Media]
|
Select the type of disc to be exported to from the list. |

Click [Settings] for [Movie] to change the format or bitrate of video and audio.
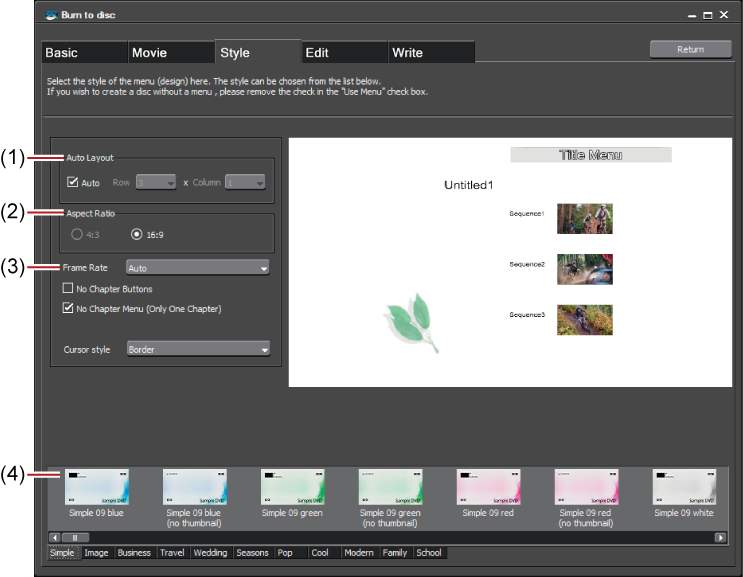
You can set the menu button arrangement or select the menu design from the list.
|
(1)
|
[Auto Layout]
|
Set the button arrangement. Uncheck [Auto] to select the number of buttons to be placed from the [Row] and [Horizontal] lists. |
|
(2)
|
[Aspect Ratio]
|
Select the size of the menu screen. If [BD] was selected for [Output], you cannot select [4:3]. |
|
(3)
|
[Frame Rate]
|
If [BD] was selected for [Output], you can change the frame rate of the menu. Normally, there is no need to change the frame rate. |
|
(4)
|
Style list
|
Select a design for the menu screen from the list. The styles are classified in each tab according to type. |
The preview of the menu is displayed. Items such as title or picture can be edited directly.

|
(1)
|
Edit screen
|
The preview of the menu is displayed. Click a title to enter text, move or resize pictures, and edit other items directly. |
|
(2)
|
Page selection
|
Select the page of the menu to be edited from the list. Click the buttons to display the previous or next page. |
Make the settings regarding the disc such as the volume label, the number of discs to be burned, drive, and burning speed.
Select the operations when the created disc is inserted in a disc player or after the title is played back.
Disc burning starts.
