To import a file saved on your PC to EDIUS, they must first be registered to the bin as a clip. The following explains how to register files or file formats that can be imported to EDIUS to the bin.
The following lists the file formats that can be imported to EDIUS:
Operation is not guaranteed for all formats described in this section.
|
|
|---|
|
|
Format |
File extension |
|---|---|
|
3GPP |
*.3gp, *.3g2, *.amc |
|
AVCHD |
*.m2ts, *.mts |
|
AVI *1 |
*.avi |
|
Blackmagic RAW |
*.braw |
|
Cinema RAW |
*.xml |
|
Cinema RAW Light |
*.crm |
|
DIF stream |
*.dif, *.dv |
|
Flash Video |
*.f4v |
|
GF |
*.xml, *.mxf |
|
H.265/HEVC |
*.mov, *.mp4 |
|
Infinity |
*.xml |
|
MPEG HDD MOVIE |
*.mod, *.tod |
|
MPEG Program Stream *2 |
*.mpg, *.mpeg, *.m2p, *.mp2, *.vob, *.vro |
|
MPEG Transport Stream |
*.m2t |
|
MPEG Video Stream |
*.mpv, *.m2v |
|
MP4 |
*.mp4, *.m4v |
|
MXF *1 |
*.mxf |
|
P2 (DV, DVCPRO, DVCPRO50, DVCPRO HD, AVC-Intra, AVC-LongG, AVC-Intra 4K/2K) |
*.xml, *.mxf |
|
ProRes RAW |
*.mov |
|
QuickTime Movie *1 |
*.mov |
|
RED |
*.R3D |
|
SONY HVR-DR60/HVR-MRC1 Meta file |
*.idx |
|
Sony RAW |
*.xml, *.mxf |
|
Sony X-OCN |
*.xml, *.mxf |
|
Transport Stream (MPEG-2, H.264) |
*.ts |
|
Windows Media *1 |
*.wmv, *.asf |
|
XAVC (XAVC Intra/XAVC Long GOP) |
*.xml, *.mxf |
|
XAVC S |
*.xml, *.mp4 |
|
XDCAM (MPEG HD422, MPEG HD, MPEG IMX, DVCAM) |
*.xml, *.mxf |
|
XDCAM EX |
*.mp4, *.avi, *.smi, *.xml |
|
XF |
*.cif, *.mxf |
|
XF-AVC |
*.mxf |
*1 The codec may not be supported depending on the video format.
*2 Use the source browser to import VOB files if they cannot be imported.
|
Format |
File extension |
|---|---|
|
AAC |
*.aac, *.m4a |
|
AIFF *1 |
*.aiff, *.aif |
|
Dolby Digital (AC-3) |
*.ac3 |
|
MPEG Audio Layer-3 *2 |
*.mp3 |
|
MPEG Audio Stream |
*.mpa, *.m2a |
|
Ogg Vorbis file |
*.ogg |
|
Wave |
*.wav |
|
Windows Media Audio |
*.wma |
*1 AIFF/AIFC files are PCM only.
*2 Some VBR are not supported.
Import of still images with sequential numbers is supported.
|
Format |
File extension |
|---|---|
|
Cinema DNG |
*.dng |
|
DPX (SMPTE 268M-2003) |
*.dpx |
|
Flash Pix |
*.fpx |
|
GIF (CompuServeGIF) |
*.gif |
|
ICO |
*.ico, *.icon |
|
JPEG |
*.jpg, *.jpeg |
|
JPEG File Interchange Format |
*.jfif |
|
Mac Pict |
*.pic, *.pct, *.pict |
|
Maya IFF * |
*.iff |
|
Multi-PictureFormat |
*.mpo |
|
Photoshop |
*.psd |
|
PNG (Portable Network Graphics) |
*.png |
|
QuickTime Image |
*.qtif, *.qti, *.qif |
|
Quick Titler |
*.etl, *.etl2 |
|
SGI |
*.sgi, *.rgb |
|
Targa |
*.tga, *.targa, *.vda, *.icb, *.vst |
|
TIFF |
*.tif, *.tiff |
|
Windows Bitmap |
*.bmp, *.dib, *.rle |
|
Windows Meta files |
*.wmf, *.emf |
|
WMPhoto |
*.wdp |
* Z-depth is not supported.

Electronic Arts IFF files (*.iff) are not supported on EDIUS.
|
Format |
File extension |
|---|---|
|
Scenarist Closed Caption |
*.scc |
|
MacCaption |
*.mcc |
Select and register a source to the bin.
1) Click [Add Clip] in the bin.

The [Open] dialog box appears.
2) Select a file and set the following items if necessary.
|
[Poster frame] |
Enter the timecode, or move the slider to the left and right to set the poster frame of the clip. |
|
[Show properties] |
Check this item to display the [Clip Properties] dialog box and view clip properties. |
|
[Transfer to Project folder] |
Transfer the clip to the project folder. |
|
[Sequence clip] |
Import the still image clips with sequential numbers in a single operation, and register them to the bin. |
|
[Detect captions file] |
Use this option to detect a closed caption file that corresponds to the selected file, merge it, and then register to the bin. |
|
[Name] |
To rename a clip registration in the bin, enter the new name of the clip. |
|
[Comment] |
Enter a comment. |
|
[Clip color] |
Color the display of clips. |
3) Click [Open].
 Alternative
Click [File] on the menu bar, and click [Add Clip]. Select the source from the [Add Clip] dialog box, and click [Open] to display the source clip on the Player. Click [Add Clip on Player to Bin] on the Player.
Double-click a blank area of the clip view, select the source from the [Open] dialog box, and click [Open].
Right-click a blank area in the clip view, and click [Add File]. Select the source from the [Open] dialog box, and click [Open].
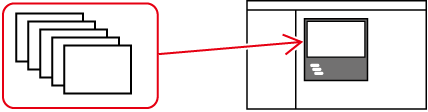
Open the folder containing the sources in Explorer, and drag and drop the source to register onto a folder in the clip view or folder view.
Press [Ctrl] + [O] on the keyboard, select the source from the [Open] dialog box, and click [Open].
You can also register sources displayed on the Player by dragging and dropping them onto the bin.
Import the still image clips with sequential numbers in a single operation, and register them to the bin.
1) Click [Add Clip] in the bin.
The [Open] dialog box appears.
Alternative
Adding clips: [Ctrl] + [O]
2) Select the first of the consecutive files, check [Sequence clip], and click [Open].
All of the consecutive still image files in the same folder are registered as a single sequence clip to the bin.
As consecutive files are regarded as a single sequence clip, if a file is missing in the sequence, files with subsequent numbers will not be imported.
You can divide a sequence clip registered to the bin into individual still image clips, or use it again as a sequence clip.
You can detect a closed caption file that corresponds to the selected file, merge it, and then register to the bin.
1) Click [Add Clip] in the bin.
The [Open] dialog box appears.
Alternative
Adding clips: [Ctrl] + [O]
2) Select a file.
Select a file with which a closed caption file is to be merged.
Multiple files can be selected.
3) Check [Detect captions file], and click [Open].
A closed caption file that corresponds to the selected file will be detected, and then registered to the bin as a single clip.
A closed caption file to be merged must satisfy the following conditions.
A file with the same name as the selected clip except for the extension
A file that exists in the same folder as the selected clip
Note that a closed caption file in a separate folder may be detected for some files.
You can merge a caption clip with a video clip, or cancel merged clips in the bin.
You can register a closed caption file alone to the bin by using the same procedure as when registering other files to the bin.
Register a folder containing supported source formats with the folder structure held intact.
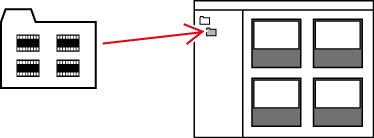
1) In the folder view of the bin, right-click the folder to register, and click [Open Folder].
The [Browse For Folder] dialog box appears.
2) Select a folder, and click [OK].
Alternative
Display the folder in Explorer, and drag and drop the folder to register onto the folder displayed in the clip view or folder view.

