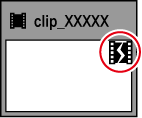
The clips will be partial offline clips under the following conditions: when a portion that forms a clip containing a proxy, when the proxy created with EDIUS cannot be referenced, when a portion of the partially transferred clip cannot be referenced, or when either L or R side of the stereoscopic clip that has the stream of both L and R sides in 2 files.
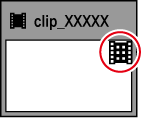
In EDIUS, you can proceed with “Proxy originated editing” in which you use a proxy source when editing, and replace it with a high-resolution source before final exporting. A proxy clip used in this proxy originated editing (a proxy clip with reference information in high-resolution) is a “temporary editing clip”. A temporary editing clip can be easily replaced with a high-resolution clip using the source browser.
Partial offline clip in the bin

Temporary editing clip in the bin

Partial offline clip in the timeline

If there are partial offline clips or temporary editing clips on the timeline, icons and the total number of the offline clips, partial offline clips, and temporary editing clips (or untransferred clips) are displayed on the timeline status bar.
For P2, if a source file that only has a proxy (XML) is imported from the source browser, it will be recognized as an untransferred clip.

|
|
|---|
|
Restore the partial offline clips by retransfer the missing source or recreating the proxy. If needed, connect the device where the original source is stored.
If either the L or R side of the stereoscopic clip cannot be referenced, perform the same restoration operations for offline clips.
1) Click the [Open Project] list button on the timeline.

2) Click [Restore Offline Clip].
 Alternative
Click [File] on the menu bar, and click [Restore Offline Clip].
3) Click [Open the clip restoration dialog] in the [Restore and transfer clip] selected dialog box.
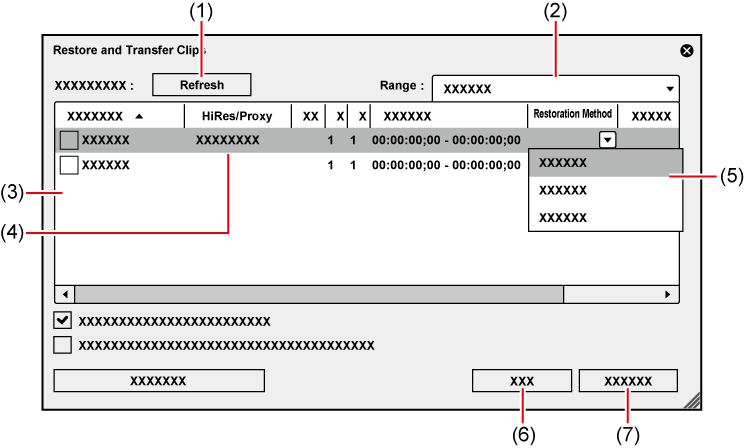
The [Restore and Transfer Clips] dialog box appears.
 Alternative
To restore the clips on the timeline only, double-click the offline clip icon on the status bar.
4) Select the target range of the clip from the [Range] list.
5) Select a clip (or clips) from [Clip list], and select a restoration method from the [Restoration Method].
6) Click [OK].
The process is executed with the restoration method selected in [Restoration Method].
7) Click [Close] in the [Restore and transfer clip] selected dialog box.
* The screen shown is an example The displayed restoration method varies according to the type of offline clips.

|
(1) |
[Refresh] |
Click this button to refresh the clip list. Restore clips to which the restoration method is set. |
|
(2) |
[Range] |
Select the target range of the clips from the list. |
|
(3) |
Clip list |
Clips whose links to the source are disconnected.
Camera proxy clips that have not been replaced by high-resolution clips.
Clips where high-resolution/proxy streams exist on a camera (or card) and which have not been transferred to a local terminal.
Clips whose links to the source are restored. |
|
(4) |
[HiRes/Proxy] |
Display the type (high-resolution or proxy) of the offline clips, partial offline clips, and temporary editing clips. |
|
(5) |
[Restoration Method] |
[Transfer the Missing Area] Retransfer the missing portion from the device where the source file prior to the partial transfer is stored. [Undo transfer] Re-link to the source files prior to the partial transfer. [Create Proxy] Recreate the proxy from high-resolution. [Delete proxy] Delete the proxy information of the clip. [Relink (select file)] The [Open] dialog box appears. Select the source to re-link. [Relink (select folder)] The [Browse For Folder] dialog box appears. Search the source with the same name in the specified folder to re-link. [Transfer All] Transfer the whole high-resolution clip, regardless of the used range on the timeline. [Transfer Only Used Area] Transfer the untransferred high-resolution clip to the used range on the timeline. [Capture all] Restore clips with the batch capture function. Importing Sources All Together (Batch Capture) [Capture only areas used in timeline] Restore only the area of the source in use with the batch capture function. Importing Sources All Together (Batch Capture) [Do nothing] The offline clips, partial offline clips, and temporary editing clips are not restored. |
|
(6) |
[OK] |
Restore the partial offline clips or temporary editing clips with the specified settings. |
|
(7) |
[Cancel] |
Close the dialog box without restoring the partial offline clips or temporary editing clips. |

If [Transfer the Missing Area], [Create Proxy], [Transfer All], or [Transfer Only Used Area] has been selected as the restoration method, the process is registered to the background job. Until the job is completed, the target clips remain partial offline clips or temporary editing clips.
If you double-click the icon on the timeline status bar to display the [Restore and Transfer Clips] dialog box, only the offline clips, partial offline clips, and temporary editing clips or untransferred clips on the timeline are displayed in [Clip list].
You can use [Capture all] and [Capture only areas used in timeline] only when clips to be restored are capture-enabled formats and reel names are set to clips.
You can change the default setting of [Restoration Method].
A temporary editing clip can be easily replaced with a high-resolution clip using the source browser.
1) Import the media recording a high-resolution clip in the source browser.
2) A message [Hi-res clips that match the proxy-only clips were found. Do you wish to replace them?] appears, then click [Yes].
A temporary editing clip is replaced with a high-resolution clip automatically.
 Alternative
To restore the clips on the timeline only, double-click the offline clip icon on the status bar.