Installing GV STRATUS VTR Ingest/GV STRATUS VTR Controller with SiteConfig
Follow the steps below for initial installation or upgrade of GV STRATUS VTR Ingest/GV STRATUS VTR Controller software with SiteConfig.
Note: To upgrade GV STRATUS VTR Ingest/GV STRATUS VTR Controller to version 11.8.x.x (and
above) in SiteConfig, you are required to select the previous version of the package and
run the uninstallation process first. Then select GV STRATUS VTR Ingest/GV STRATUS VTR Controller package 11.8.x.x (and above) to install.
For an upgrade, you can modify steps accordingly.
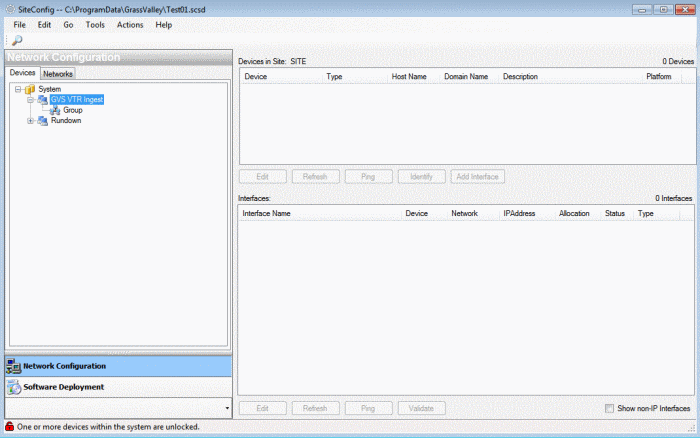
- Use the SiteConfig shortcut on the Windows desktop or in the Start menu to open SiteConfig.
- The SiteConfig main window opens.
-
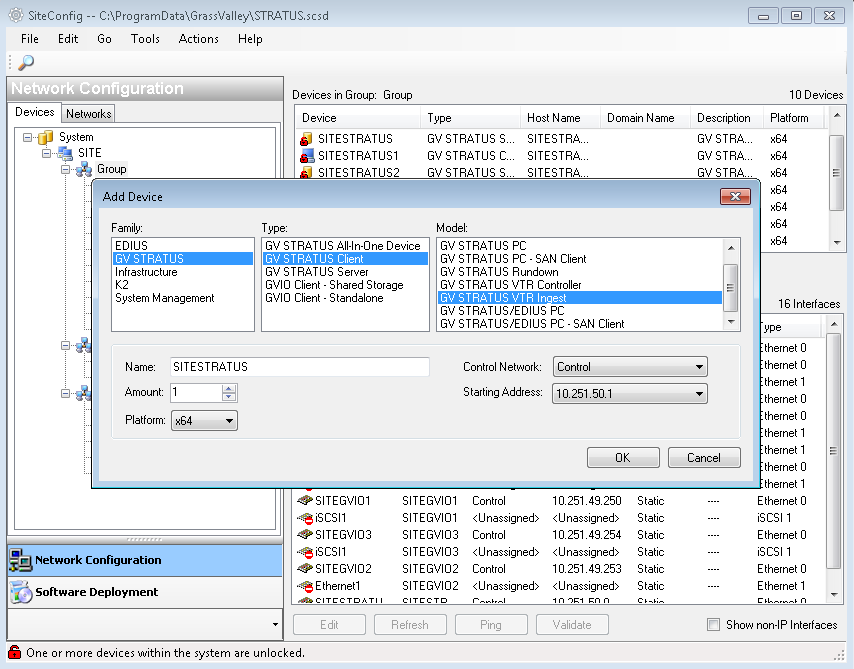
In the Network Configuration | Devices tab, right-click on a group and select
Add Device.
The Add Device dialog box opens.
-
Configure settings for the GV STRATUS VTR Ingest as follows:
- Family – Choose GV STRATUS.
- Type - Choose GV STRATUS Client.
- Model - Choose GV STRATUS VTR Ingest or GV STRATUS VTR Controller.
- Name – Enter the GV STRATUS VTR Ingest or GV STRATUS VTR Controller device name.Note: This is the device name, as displayed in the SiteConfig device tree view and device list view. This name can be different than the host name (network name). You can accept the default name or enter a name of your choice. Devices in the tree view are sorted alphabetically.
- Amount – Select 1 since you are only adding one device.
- Platform type - Select x64 if
the device has a 64 bit OS. Note: Select x86 if the device has a 32 bit OS, x64 if it has a 64 bit OS.
- Control Network – Defaulted to Control.
- Starting Address – Select from the list of available addresses on the selected control network. If adding multiple devices, this is the starting address, with addresses assigned sequentially to each device added.
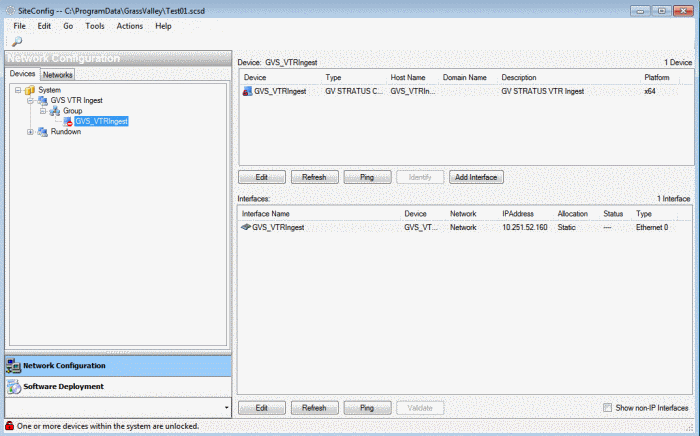
- Click OK to save settings and close. A new device GV STRATUS VTR Ingest is successfully added.
-
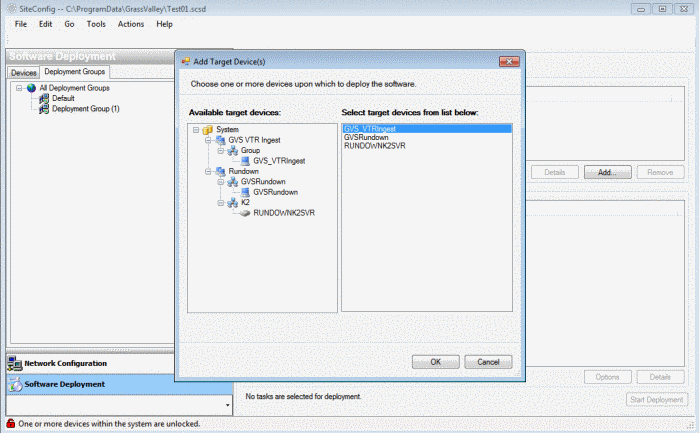
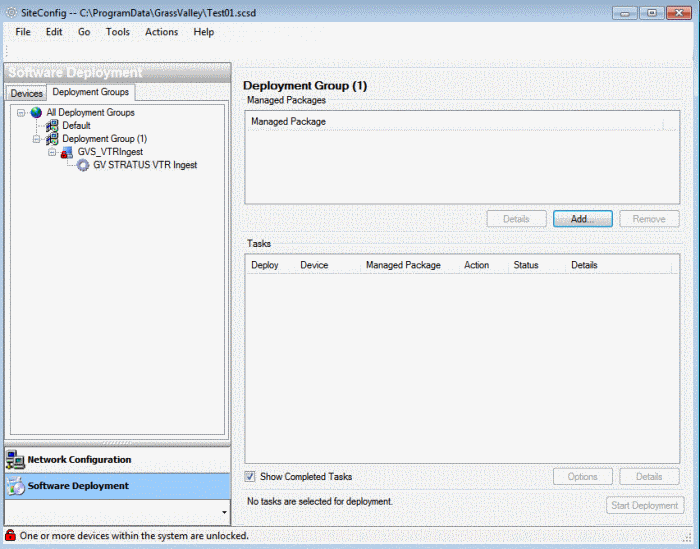
In the
Software Deployment | Deployment Groups
tab, right-click to add a new deployment group. Then right-click on the new deployment
group and select Add Target
Device.
The Add Target Device(s) wizard opens.
-
Select the device that you added earlier and click
OK.
GV STRATUS VTR Ingest appears in the Deployment Groups tree view under the deployment group.
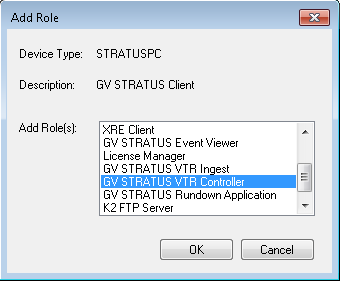
You can also add GV STRATUS VTR Controller device if both are going to be installed on separate devices.
- To add GV STRATUS VTR Controller to the same device, right-click on the device and select Add Role | GV STRATUS VTR Controller.
- Click OK.
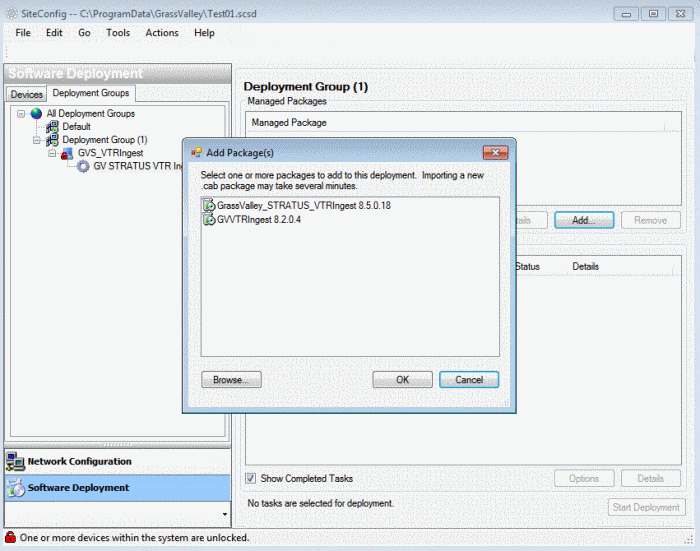
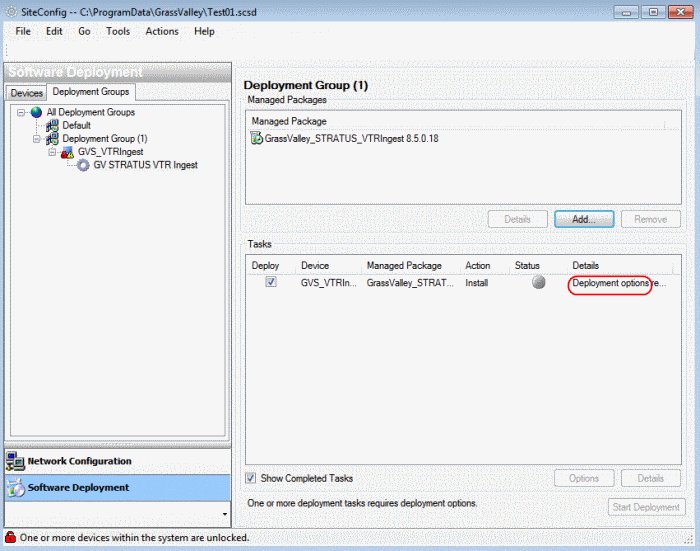
- To add a software package to the deployment group, click the Add button on the right of the SiteConfig application. The Add Package(s) dialog box opens.
- Select the GV STRATUS VTR Ingest/GV STRATUS VTR Controller package or both packages, and click OK.
-
EULA is
displayed as follows and accept them to proceed.
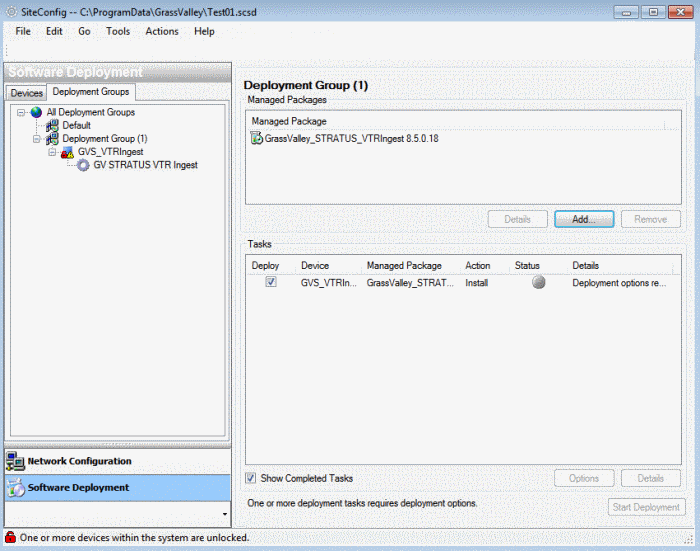
SiteConfig adds the package to the deployment
group.
The package appears in the Managed Packages list for the selected deployment group. SiteConfig creates new software deployment tasks for the package and displays them in the Tasks list view.
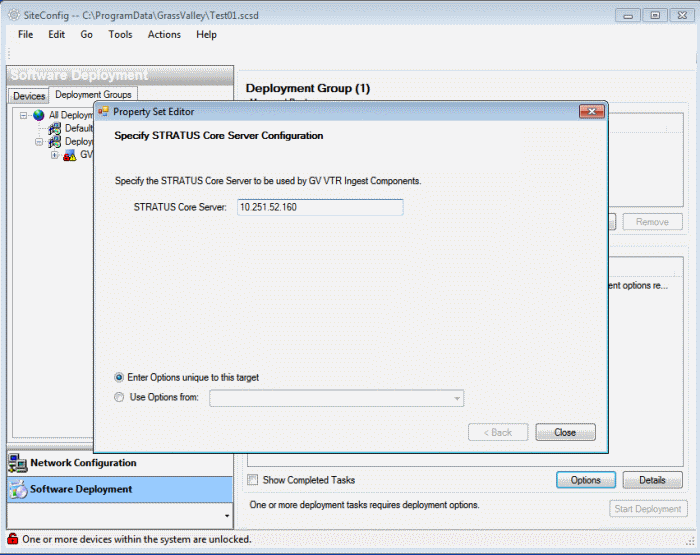
- Do one of the following to set deployment options:
- Work through the wizard to set options. In this example, the system is configured to connect to the GV STRATUS Core Server.
- Click Close to save the deployment option.
- Click the Start Deployment button to install GV STRATUS VTR Ingest/GV STRATUS VTR Controller.