
Adding Button Panels
-
Within the Logging
Suite panel, click the Add Button Panel
button.

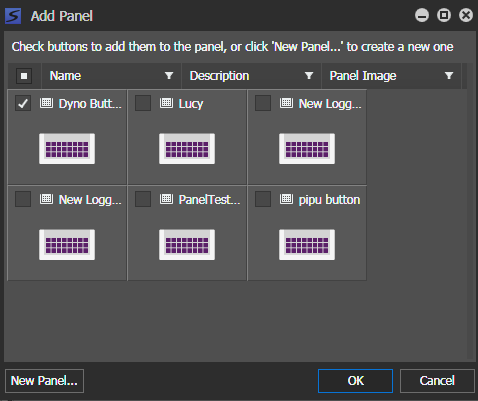
The Add Panel dialog opens.
-
To choose from existing Button Panels, select the
checkbox of the Button Panel to add it to
the Logging Suite.
Then, click OK.
-
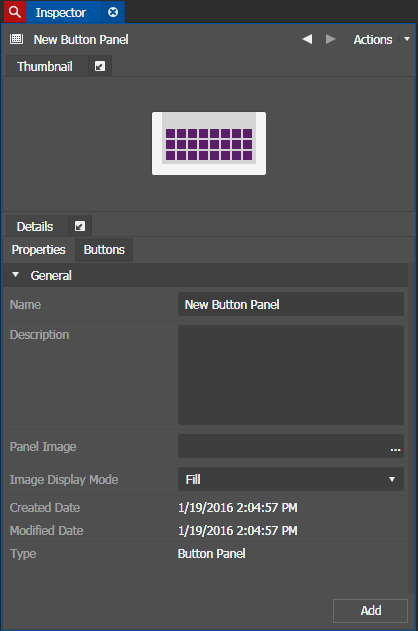
To create a new Button Panel, click
New Panel.
The Inspector loads the configuration page for a new Button Panel.
-
Enter the
Name and
Description of the new
Button Panel.
You can also browse and select an image to be the Panel Image of the Button Panel.
The Image Display Mode can be selected as follows:- Fill: The image fills the entire Button Panel.
- Maintain Aspect Ratio: The image maintains its aspect ratio in the Button Panel.
- Original Size: The image displays according to its original size in the Button Panel.
- Manual: The image size can be resized manually in the Button Panel.
-
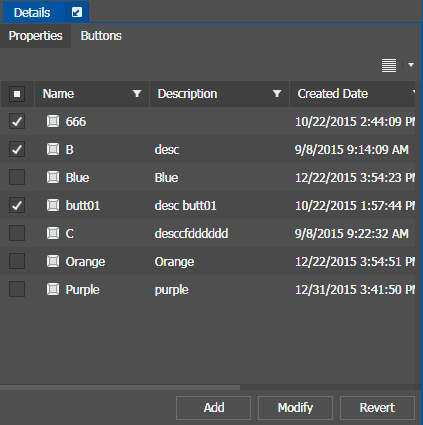
Click on the Buttons tab, and select
logging buttons for the panel by checking the box next to each customized
button.
You can also create new buttons later if you don't want to use existing logging buttons.
-
Click Add to add the Button Panel to the Logging Suite.
Note: If you received a Button Panel via the Send Message tool, the Button Panel is saved automatically in your Advanced Logging tool. If the Button Panel already exists, it is automatically saved and updated according to the received Button Panel.
-
Repeat previous steps if you want to create multiple
Button Panels.
You can also click Revert to undo any changes.
You can rearrange Button Panels within the Advanced Logging tool to best suit your workflow needs by dragging and dropping panels within the user interface. To customize your workspace, refer to About customizing the application workspace.