Creating and adding logging buttons
-
Click the
Add Button
 on the
Button Panel.
on the
Button Panel.
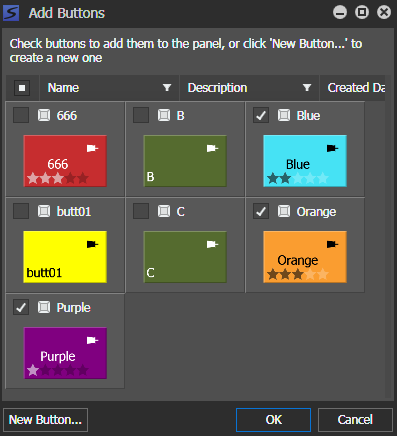
The Add Buttons dialog opens.
-
To choose from existing buttons, select the checkbox of each button to add it
to the Button Panel.
Then, click OK.
-
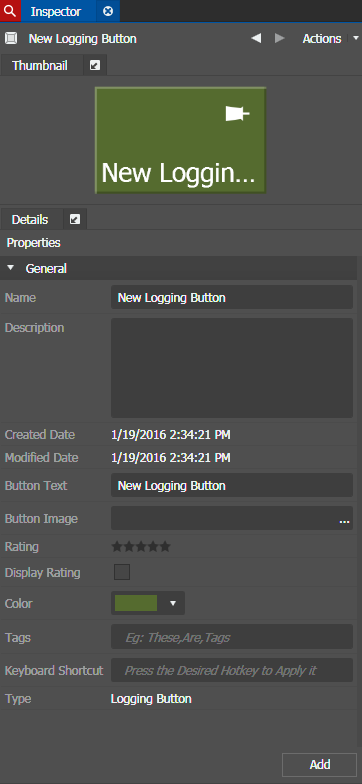
To create a new logging button, click New Button.
The Inspector loads the configuration page for a new button.
Custom metadata for markers are also available in the Inspector if already configured in the GV STRATUS Control Panel.
-
Enter the Name and Description of the new logging
button.
The name displays in both Name and Button Text fields.
- Enter the Button Text if you want to display a different name on the logging button.
-
Click the
Browse button
 button
to browse and select the Button
Image.
button
to browse and select the Button
Image.
- Select the Rating for the logging button.
- Select the Display Ratings checkbox if you want to display the logging button rating.
-
Click the drop-down list of the
Button Color to display the color palette, and
do one of the following:
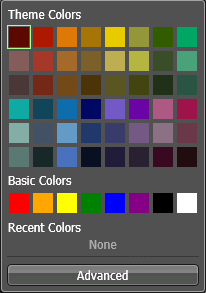
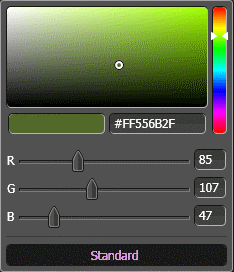
The color of the logging button changes according to the selected color.
- Enter the Tag of the logging button if desired.
-
Enter the
Keyboard Shortcut for the logging button by
doing one of the following:
- Press one key only.
- Press one key
and one modifier key simultaneously.
Note: Tab and Alt modifier keys are not supported.
- Press one key
and two modifier keys simultaneously.
Note: Pressing Alt, Shift, and one key simultaneously is not supported.
A keyboard shortcut can be assigned to multiple logging buttons on your Button Panels.
However, you cannot assign existing keyboard shortcuts of GV STRATUS tools for your logging button. Keyboard shortcuts of other GV STRATUS tools do not appear on the Keyboard Shortcut box when pressed.
- Click Add to add the logging button to the Button Panel.
-
Repeat previous steps if you want to create more logging buttons.
Logging buttons are automatically saved after they are added into the Button Panel.