Trimming a clip
With the RMI tool, you can trim a clip prior to import. To use the Trim operation, you must be logged on with a user account to which the Trim Rights role is assigned. If the role is not assigned, the Trim operation is not available.
Note: Trimming is only supported with individual clips.
- On the RMI list, select the clip that you want to trim.
- Drag the clip from the RMI tool and drop it into the Inspector.
-
Navigate to the desired starting point using the scrub bar,
and click the Mark In
button.
 (
( I)
I)
-
Navigate to the desired end-point using the scrub bar, and
click the Mark Out
button.
 (
O)
(
O)
Trim Asset is enabled when the asset has a mark-in or mark-out point. It is disabled if the asset does not have a mark-in or mark-out point.
Note: If a clip is a part of Dyno record train sequence, Mark In and Mark Out points should not be set beyond the limit of the guard band, as configured for the record train sequence. -
Click the Actions drop-down arrow and select Trim Asset.
The Confirm Trim dialog opens.
-
Click Trim to trim the clip.
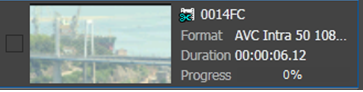
You can see the new duration and the scissor icon within the RMI list to signify that it is a trimmed clip.