Configuring Scheduler User Preferences
You can configure Schedule Monitor settings and create an event template within the user preferences window.
- Select Edit | User Preferences. The User Preferences dialog box opens. The GV STRATUS application shows or hides sections based on the roles assigned to your GV STRATUS log on credentials.
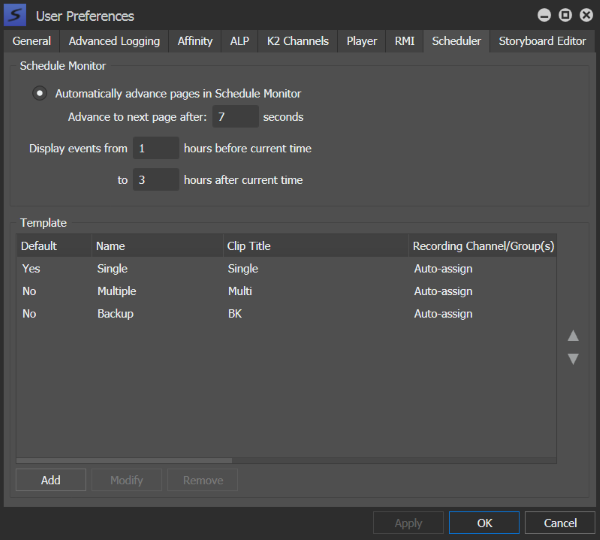
- To configure Scheduler user preferences, select the Scheduler tab.
-
To configure Schedule Monitor settings, do the following:
- If you want Schedule Monitor pages to change automatically, select Automatically advance pages in Schedule Monitor.
- Enter the number of seconds before advancing to the next page.
-
Enter the desired number of hours before
and after the current time for event display in the Schedule Monitor.
Note: When setting the number of hours before and after the current time, do note that all the events will be kept in memory. Set the hours to the minimum viable value for your system environment.
Ingest events display in the Schedule Monitor according to selected settings.
-
To create a template, click Add.
The Add Template dialog opens.
Note: To enable the Custom Metadata Feature on Scheduler Event Templates after a new install, refer to Setting Custom Metadata in the Ingest Database. -
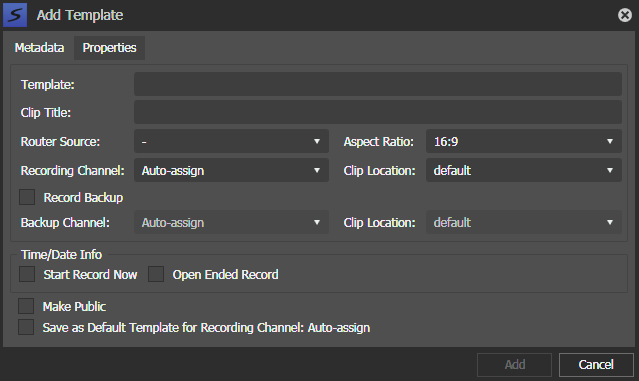
Fill in the template information on the Metadata tab of Add Template
dialog.
If the option to Only show location according to recording device is selected in the Ingest Location Setup in GV STRATUS Control Panel, only Clip Locations in the same K2 system as the configured Ingest channel are available for selection.
Note: If the recording channel is set to Auto-assign, all clip locations are available in the drop-down list.You can also select the check box to make the template public and set a default template for the selected recording channel.
-
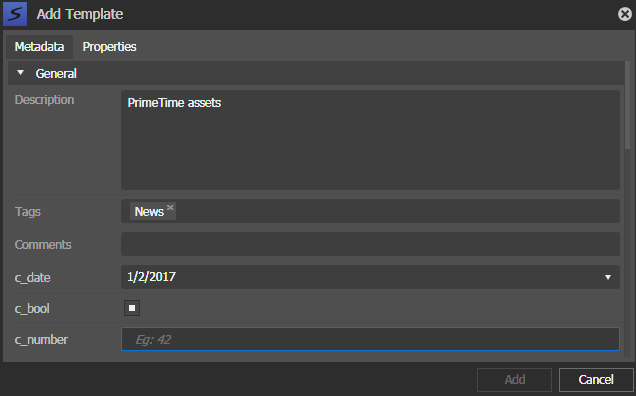
Click on the Properties tab, then enter the Description, Tags, Comments, and
custom metadata if configured, into the template.
Custom metadata must be configured in the GV STRATUS Control Panel before they can be displayed on the Properties tab. Read and write permissions must also be assigned to each custom metadata. If write permission is denied, the custom metadata is not editable on the Properties tab.
-
Click Add to save the template.
The newly added template appears on the template list in the Scheduler user preferences.
You can select the template when adding or modifying events in the Scheduler tool.
- To apply a change and continue editing user preferences settings, click Apply.
- To accept any changes and close the dialog box, click OK. The dialog box closes.