Install chassis in rack
Once you have installed the rack mounting brackets, install the FT server empty chassis enclosure in the rack.
Note: Installation will vary slightly according to whether there is an
adapter on the front of the rack. A standard EIA IT rack with no adapters is
shown.
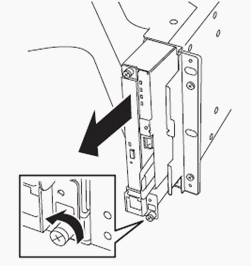
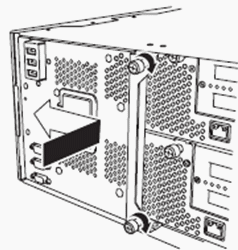
- Remove the front unit containing the DVD drive and the LED module from the front of the chassis by loosening the screw at the bottom of the unit and pulling it out.
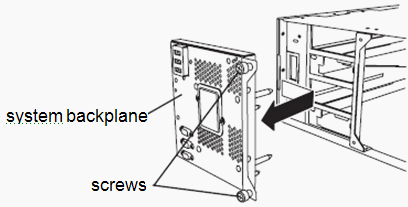
- At the rear of the chassis, remove the system backplane. Loosen the two thumb screws then move the backplane slightly to the right and pull it straight out from the chassis.
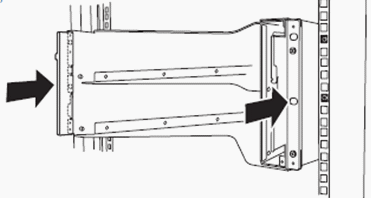
- Insert the empty chassis into the rack from the front.
- Align the empty chassis so it is centered on the side rack mount rails.
-
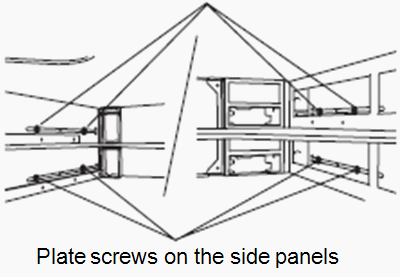
Loosely install the 8 plate screws through the holes on the inside
of the empty chassis, fastening to the threaded holes in the side rack mount
rails, as shown below. Tighten just enough to hold them in place.
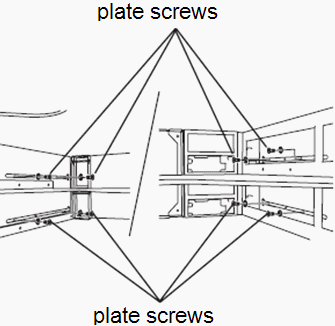
- Securely attach the front of the chassis to the rack front with 4 panhead screws.
- Tighten the 8 internal plate screws you installed earlier to secure the chassis to the side rack mount rails.
-
Remove the 4 panhead screws you installed earlier.
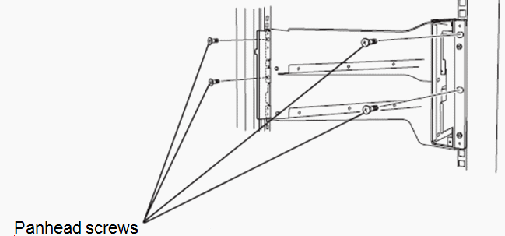
-
Fasten the bezel brackets to the front of the chassis on each
side. Use the 4 panhead screws. Tighten securely.
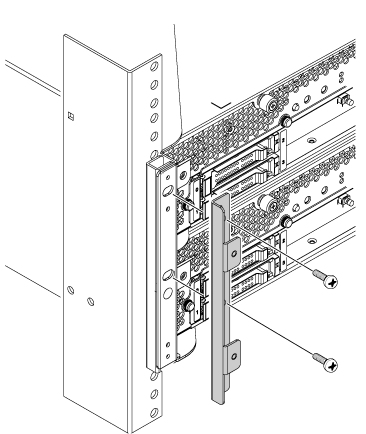
- Reinstall the system backplane in the rear of the chassis by inserting it straight into the slot then sliding it all the way to the left. Fasten the thumb screws securely by turning to the right.
- Reinstall the front unit containing the DVD drive and LED module in the front of the chassis in the reverse order done in Step 1 of this procedure.
- Now install the two CPU/IO modules as described in the next section.

