Remove a CPU/IO module
You may remove either CPU/IO module from the rack-mounted enclosure for exchange if required.
Please note the following precautions before doing so:
- Power down the CPU/IO module you are replacing by removing the AC line cord from the rear of that module. When installed, the AC line cords are held in place by stopper bars preventing the removal of the CPU/IO module.
- Have at least two people available to remove a CPU/IO module.
- If you are removing a failed CPU/IO module for exchange, after you have removed the CPU /IO module, you must remove all hard drives in their caddies from the failed module. You must label the hard drives with their drive slot location numbers as you remove them. They must be re-installed in the same hard drive slots when the exchange CPU/IO module is received from the factory. If not, the mirrored hard drives will be out of sync.
Remove either CPU/IO module as described below.
- Remove the AC line cord from the module you are removing.
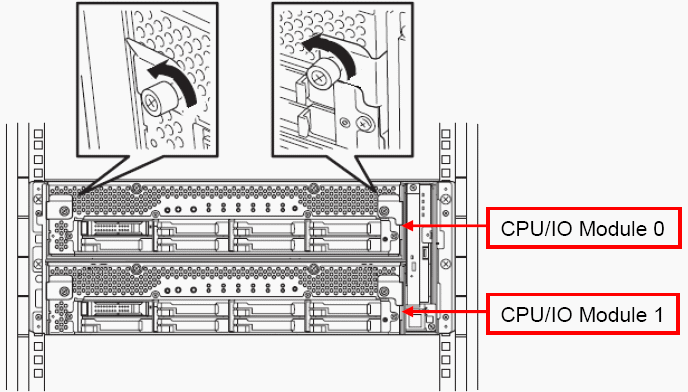
- Remove the front bezel from the front of the unit by loosening the screws on either side of the bezel.
- On either side of the module you are removing, loosen the left and right screws to unlock the lock levers holding the module to the sides of the enclosure.
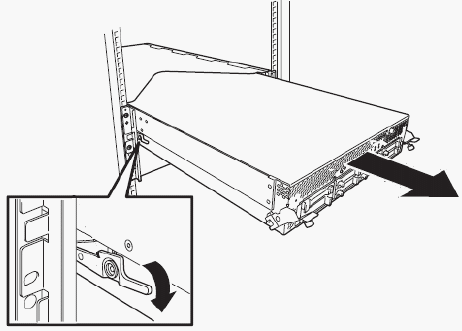
- Slowly pull out the CPU/IO module until the side lock lever on the left side of the module catches on the lock mechanism.
-
Push down on the side lock lever as shown below so it is
horizontal and will slide over the lock mechanism, allowing you to pull out the
module completely.