Restoring a GV STRATUS Core Server on a FT Server platform from a system-specific recovery disk image
Restoring the GV STRATUS core server from a generic image is not recommended. You must restore the core server from a system-specific recovery disk image.
- Disconnect network cables.
- Disconnect power cabling from bottom CPU/IO module.
- In top CPU/IO module, leave drive 0 in slot, remove all other drives.
- Provide AC power to top CPU/IO module.
- Provide access to the disk image file to which you are restoring. For example, connect an external drive containing the image.
- Startup and in BIOS setup, disable OS Boot Monitoring.
- Using the Acronis recovery disk image process as appropriate for the FT Server, restore the disk image to the top CPU/IO module using Acronis. The process to boot into Acronis takes several minutes. The restore process takes approximately two hours. Refer to related topics in this Topic Library.
- Restart and log in to Windows as Administrator.
- When prompted, enter Windows operating system product key and activate later.
- Restart as prompted.
- Complete items as prompted by the sysprep process, including the following: The server restarts.
- If Server Manager opens, select Don't show again at startup.
- In the top CPU/IO module, insert all drives.
- In the bottom CPU/IO module, insert all drives.
- Connect power cabling and start up bottom CPU/IO module.
-
On the Desktop, double-click the ftSys Management Tools
shortcut.

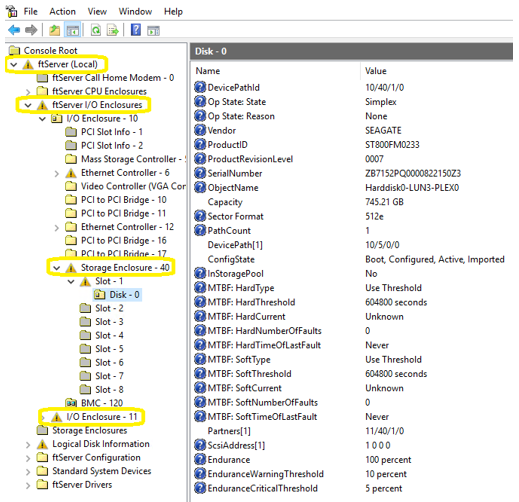
- Go to ftServer (Local) | ftServer I/O Enclosures | I/O Enclosure – 10* | Storage Enclosure - 40 | Slot - 1 | Disk - 0.
- Right-click on Disk – 0 and select Create RDR Virtual Disk.
-
Follow the pop-up instructions and close them when finished.
An automatic reboot will occur in 2 minutes—just allow it to reboot on its own.
- After the reboot, reopen the ftSys Management Tools.
-
Go to ftServer (Local) | ftServer I/O Enclosures | I/O Enclosure –
11* | Storage Enclosure - 40 | Slot - 1 | Disk – 0.
Note: *10 is the upper server and 11 is the lower server.
-
Right-click on Disk – 0 and select Add
Physical Disk to RDR Virtual Disk.
Syncing the disks takes about 3 hours.
Note: You can do minor configurations to the FT server while it is syncing. -
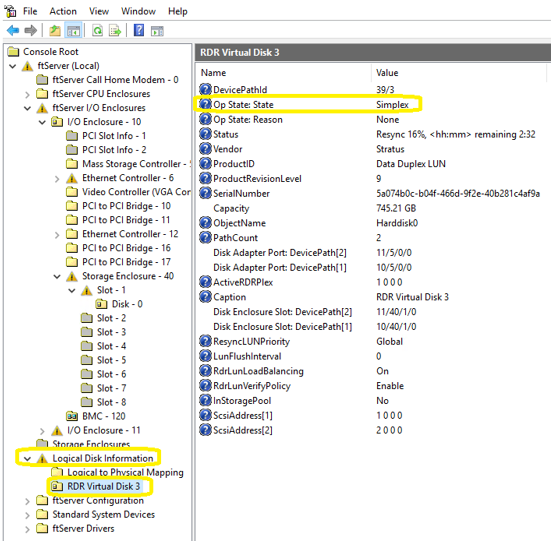
Monitor the syncing progress either in the secondary Disk –
0 window or in the ftServer (Local) | Logical Disk
Information | RDR Virtual Disk 3 window.
The primary Disk – 0 window displays Simplex under Op State: State until the disks finish syncing.
- Verify that the disks indicate Duplex after syncing is finished.
-
Reboot the FT server and go back into F2 – Setup.
- In the Server tab, set the OS Boot Monitor back to Enabled.
- Save Changes and Exit.
- Set duplex LAN configuration to team the left NICS in each server and the right NICS in each server. Refer to related topics in this Topic Library.
- Name teams Control Team and FTP Team. Refer to related topics in this Topic Library.
- Reorder network adapters so the Control Team is first and the FTP Team is second. Refer to related topics in this Topic Library.
- Turn off the FT server firewall.
- Remove the GVAdmin account from the Deny log on locally list.
- Install SiteConfig Discovery Agent. Refer to related topics in this Topic Library.
-
Configure the D:/E: drives before configuring the FT server to a GV STRATUS
system.
The D: (data) drive can be set to 200 GB and E: (backup) the remaining space.
- Install SQL. Before installing SQL, make sure that you copy the correct StratusSQLConfigurationFile.ini file onto the system so that the database is installed on the D:\ partition.
- Activate the Windows operating system.
- Do any Windows High Priority updates that are not already installed.
- Install GV STRATUS software.
- If the FT server has a proxy share, on proxy share security settings make sure the local "Everyone" has read permission.
- If the FT server has a proxy share, add the internal system account, which by default is GVAdmin, to the local Administrators group and on proxy share security settings give that account full permissions.