Task 2: Preparing a PC for Configuring the Application Server
You will use a client PC to configure the new Application Server. The client PC must have network settings that will allow it to communicate with an iControl Application Server in its default state.
1. From the Start menu, click Control Panel.
[ Graphic ]
System Response: The Control Panel appears.
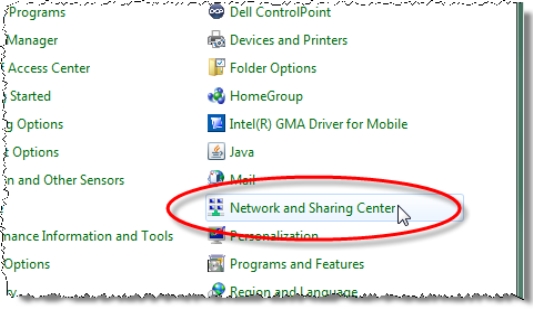
2. Click Network and Sharing Center.
[ Graphic ]
System Response: The Network and Sharing Center appears.
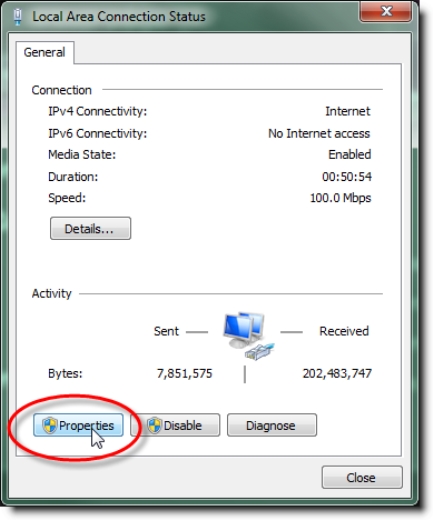
3. In the Access type area, click the link that corresponds to your LAN Internet connection (Local Area Connection in the example shown).
[ Graphic ]
System Response: The Local Area Connection Status window appears.
4. Click Properties.
[ Graphic ]
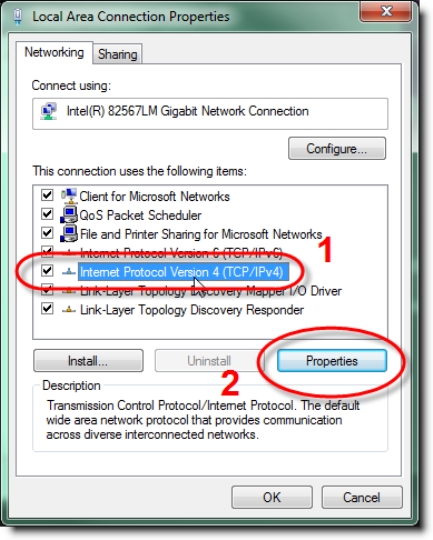
System Response: The Local Area Connection Properties window appears.
5. Select Internet Protocol Version 4 (TCP/IPv4), and then click Properties.
[ Graphic ]
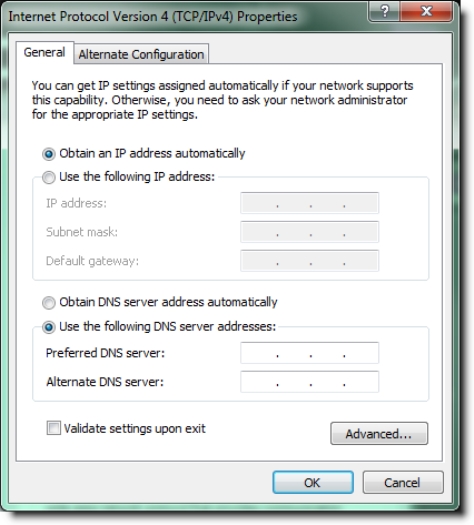
System Response: The Internet Protocol Version 4 (TCP/IPv4) Properties window appears.
[ Graphic ]
6. Take note of the PC’s current settings.
7. Click Use the following IP address.
8. The default IP address of each new iControl Application Server is 10.0.3.6. On the client PC, type an address in the same range (e.g. 10.0.3.10) in the IP address field.
9. The default subnet mask of each new iControl Application Server is 255.255.0.0. On the client PC, type 255.255.0.0 in the Subnet mask field.
NOTE: The default IP address and subnet mask settings for the Application Server are usually shown on a sticker on the top cover of its chassis. |
[ Graphic ]
10. Click OK to apply these settings.
11. In the Local Area Connection Properties window, click OK.
12. Close the Network and Sharing Center control panel.
NOTE: Remember to return the PC to its original network settings once you have finished configuring the iControl Application Server. |