Modifying Physical Router Configurations
NOTE: Although it is possible to perform the following procedure as a stand-alone task (assuming all stated requirements are met), Grass Valley recommends you familiarize yourself with the sample workflow on page 2 in which this procedure is only one step within a sequence. |
REQUIREMENT: |
Before beginning this procedure, make sure you have opened Router Manager Configurator ( click HERE). |
1. In Router Manager Configurator, in the router manager folder, double-click the Physical Routers sub-folder.
[ Graphic ]
Router Manager Configurator (Physical routers folder indicated)
System Response: A series of folders appears, one for each physical router.
[ Graphic ]
Expanded Physical routers folder (physical routers circled)
2. If you would like to modify router settings (as opposed to router level settings), perform the following sub-steps:
a) Select the appropriate physical router in the left pane.
System Response: The right pane is populated with the current settings for the selected physical router.
b) Modify the physical router settings as required.
3. If you would like to modify the settings of a particular level belonging to a physical router, perform the following sub-steps:
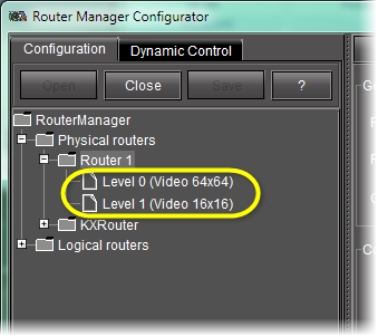
a) In the left pane, double-click the appropriate physical router.
System Response: The levels within the router become visible.
b) Select the level whose settings you would like to modify.
System Response: The right pane is populated with the current settings for the selected level.
c) Modify the level settings as required.
4. Click Save.