Configure LAN Connect Configuration page - Client
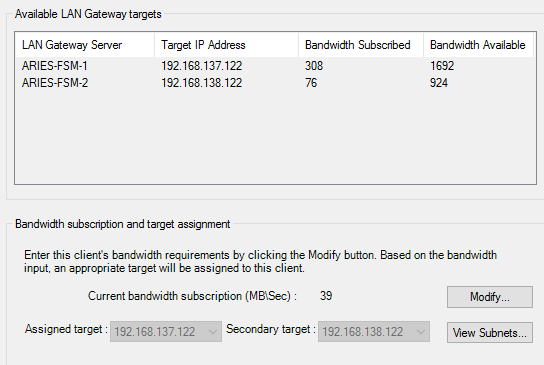
This page lists the LAN Gateway adapter on your K2 Media Server as an LAN Gateway target. The K2Config application subscribes the SAN client to the LAN Gateway target and allocates bandwidth, based on the bandwidth values that you enter. The K2Config application keeps track of each SAN client's bandwidth, and when the total amount allowed by the K2 SAN license is consumed, the K2Config application displays an informative message and then disables your ability to add more SAN clients. For large systems, the K2Config application can load balance SAN clients across multiple LAN Gateway targets.
If a custom K2 SAN, qualified system designers can click View Subnets to help assign LAN Gateway targets.
-
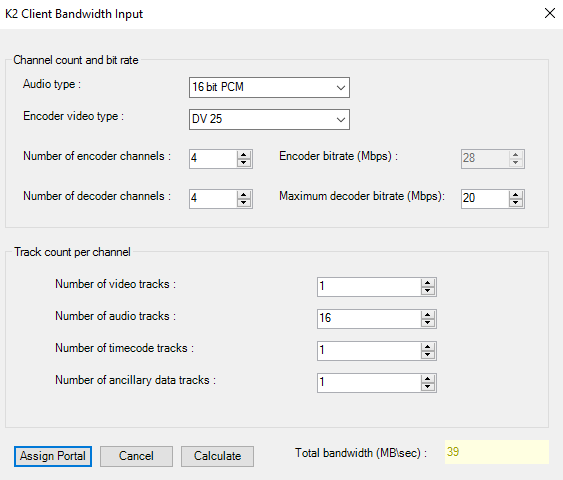
For a K2 Client, click Modify.
The K2 Client Bandwidth Input dialog box opens.
- Enter the channel count, bit rate, and track count per channel information according to your intended use of the K2 client. If using ChannelFlex Suite with multiple inputs and/or outputs per channel, do not enter the number of channels. Instead do the following:
- Click Calculate.
- Click Assign Portal, then OK to confirm. If you have a redundant K2 SAN, the K2Config application makes the appropriate assignment to the redundant server, as reported in the Secondary target box.
-
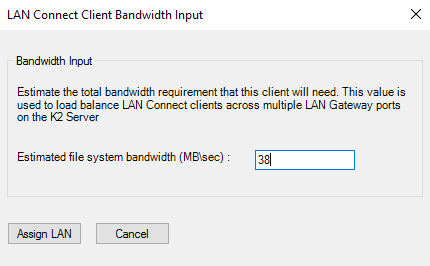
For a GV I/O client, click Modify.
The LAN Connect Client Bandwidth Input window appears.
-
Enter the estimated file system bandwidth and click Assign
LAN.
The K2 Config application assigns the bandwidth based on the values that you entered. In a redundant K2 SAN, the K2Config application makes the appropriate assignment to the redundant server, as reported in the Secondary target box.
If K2Config does not automatically add the Secondary target IP Address for GV I/O after modifying the bandwidth subscription, you must choose your LAN Gateway port manually.
- Click Next.