
Creating a new file system - Redundant K2 SAN
- If you have not already done so, launch Storage Utility from the K2Config application.
- As prompted, wait while Storage Utility gathers system information, then Storage Utility opens.
-
In Storage Utility, click
Tools | Make New File System.
The Setting dialog box opens.
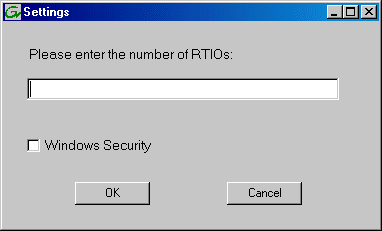
- For the Real Time Input/Output (RTIO) rate, enter the value specified by your system design. If you do not know this value, contact your Grass Valley representative.
-
Configure Windows Security as follows:
- If the K2 SAN is on a network Workgroup (not domain), do not select Windows Security .
- If the K2 SAN is on a network domain, you may select Windows Security.
Note: Only select Windows Security if the K2 SAN is on a domain. Never select Windows Security if the K2 SAN is on a workgroup. -
Click
OK.
The Set Stripe Group dialog box opens.
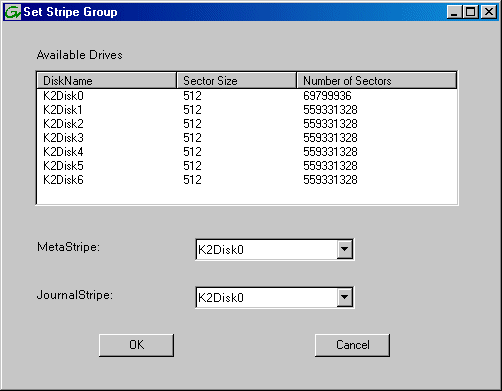
- If you have a RAID 1 RANK, assign the RAID 1 RANK for both MetaStripe and JournalStripe. You can distinguish a RAID 1 RANK from a media RANK by the value in the Number of Sectors column.
-
Click
OK.
The Configuration File dialog box opens.
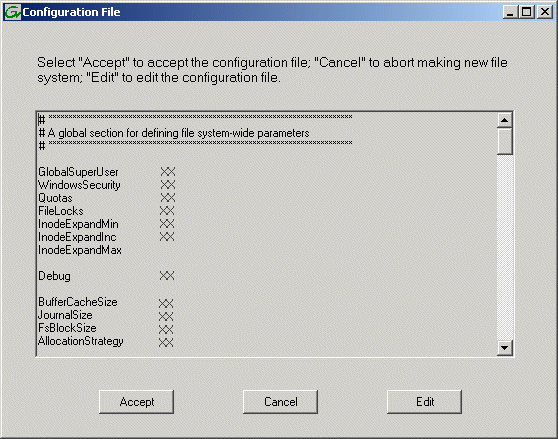
The configuration file for the media file system is displayed. - Verify media file system parameters. Do not edit the configuration file for the media file system.
- Click Accept. A “…Please wait…” message box displays progress and a “…succeeded…” message confirms the process is complete. A message informs you that you must restart the server, however the restart at the end of the Configure K2 Server wizard suffices, so you do not need to restart now.
-
Close the Storage Utility.
Note: Do not attempt to start SAN-attached systems or otherwise bring the SAN online until instructed to do so by the documented procedure.