Removing a Media Drive
Before a media drive is removed from the K2 Central-Tx Server storage it must be taken offline. When a drive is offline it can be removed with a one second or less interruption in storage operation. Storage operation will be interrupted for 5 seconds if a media drive is removed from the K2 Central-Tx Server storage without first being taken offline
- Logon as Administrator, password: adminGV!
- Start the Storage Utility using the desktop icon.
- Connect using localhost.
- Logon as Administrator, password: adminGV!
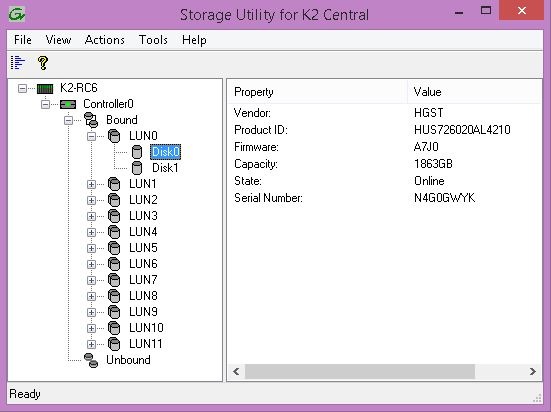
- In the left pane of the Storage Utility main window select the + next to the storage icon to view the Controller.
- Select the + next to the Controller icon to view the Bound and Unbound drives.
- Select the + next to the Bound drive icons to view the LUNs
- Select the + next to the LUN icons to view the drives.
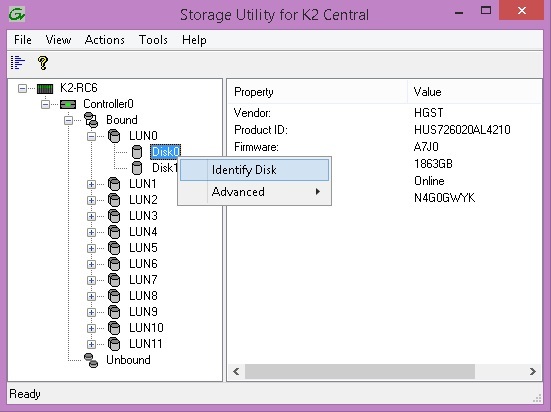
- Failing drives are identified in Storage Utility with a red X on the Disk icon. These drives have a red LED lit on the front of the drive carrier. Drives can also be identified by a right-click on the disk icon and selecting Identify. This will flash the red LED on the front of the drive carrier.
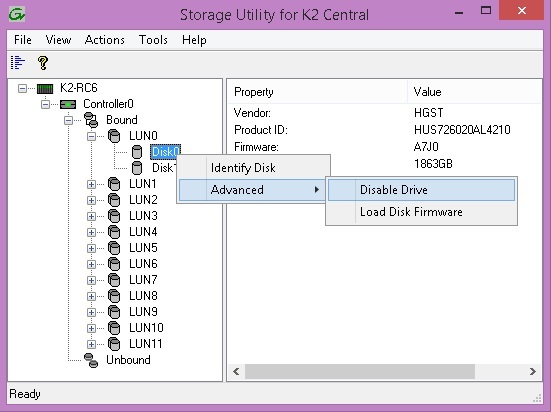
- Select the disk to disable by right clicking on the Disk icon and selecting Advanced | Disable Drive.
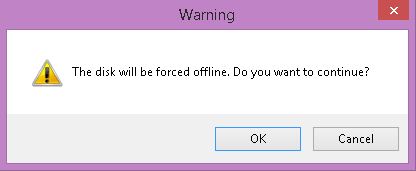
- A warning that this will force a disk offline will appear. Select OK to continue.
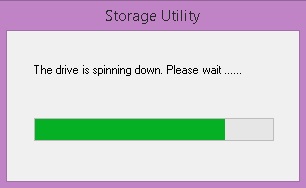
- A status window will appear while the drive is taken offline.
- When done another dialog will indicate the drive is offline.
- The drive can now be removed from the K2 Central-Tx Storage. Press the release button on the front of the drive carrier, pull the lever out and pull the drive straight out of the slot.