Setting up Access Control
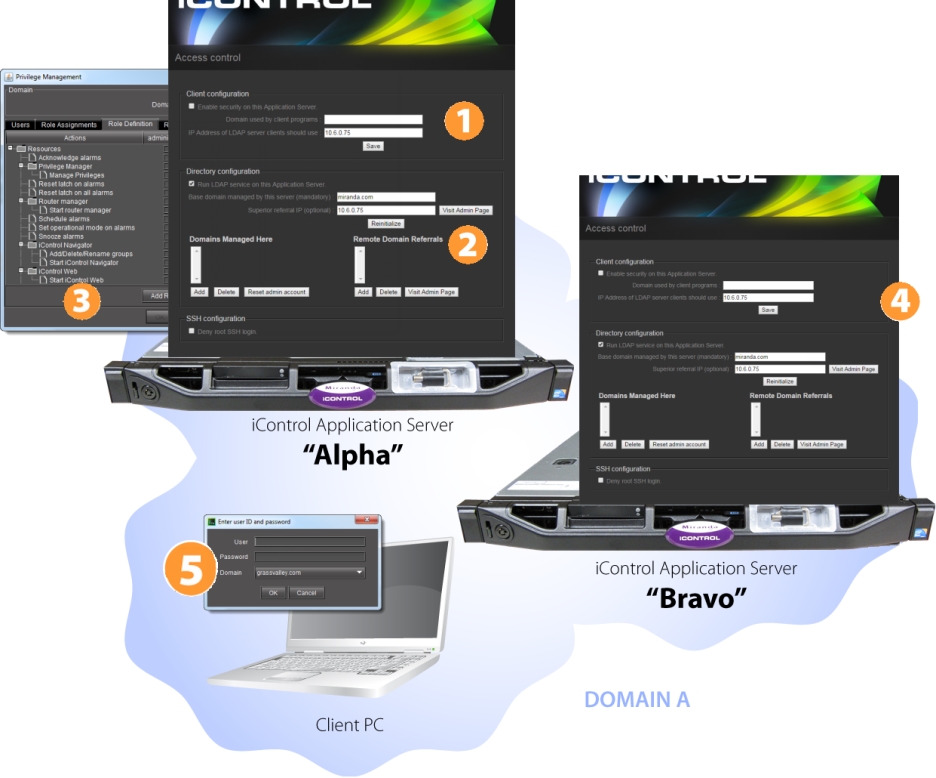
The figure below depicts a simple scenario — a single domain with two iControl Application Servers.
Here are the steps you would follow to set up Access Control in this scenario, along with references to the associated procedures in this chapter:
1. Activate LDAP service — Open the
iControl—Access control page (
click HERE) of an Application Server (e.g.
Alpha) to set up and activate an LDAP service, including building a list of managed domains and remote domain referrals (if any) (
click HERE).
2. Enable access control — Enable access control on
Alpha (
click HERE).
3. Configure users, roles, and permissions — Open iC Navigator from Alpha, and then use the Privilege Management window to create users, assign roles (e.g. operator, admin), and assign permissions (e.g. ability to open a control panel). Then open iC Creator and use the Page Privilege Management window to assign Web-based permissions (e.g. ability to open a Web site).
See:
4. Configure other Application Servers — Open the iControl—Access control page of other Application Servers in the same domain (e.g. Bravo) to enable access control and to point to the LDAP service running on Alpha.
5. Client login — When a user opens an application (e.g. iC Navigator, iC Web) from Alpha or Bravo, he/she must log on to begin an iControl session. From that point on, their ability to perform various operations will depend upon what role they have been assigned (and how that role was configured).