Adding an Object from an SNMP Table
This procedure applies to MIB parameters that are contained in an SNMP table.
REQUIREMENT: |
Before beginning this procedure, make sure you have opened iC Creator ( click HERE). |
1. In iC Creator, open a Web page.
2. On the View menu, click Open MIB Browser.
System Response: The MIB Browser window opens.
3. On the File menu, click Load MIBs from application server.
NOTE: If the MIB for the device you are working with is not on the Application Server, use the Load MIB command to browse elsewhere. |
4. In the list that appears, find and select the MIB for the device you are working with.
5. Click OK.
System Response: The selected MIB is loaded and appears in the left column of the MIB Browser.
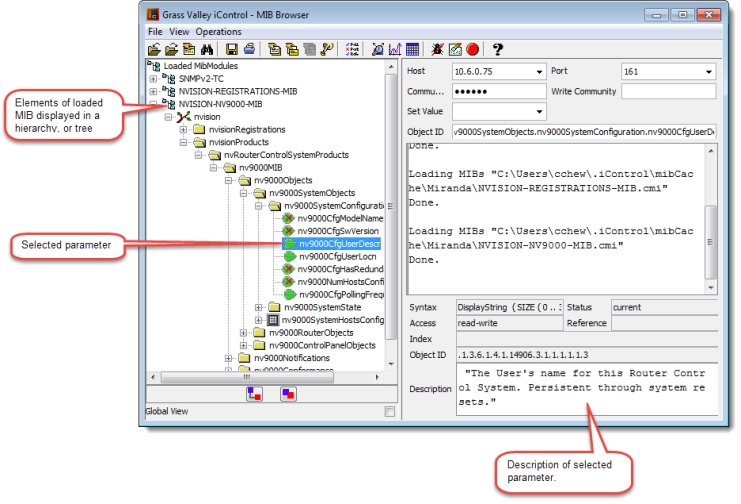
6. Find and select the parameter you wish to monitor in the hierarchy (tree) of the loaded MIB.
[ Graphic ]
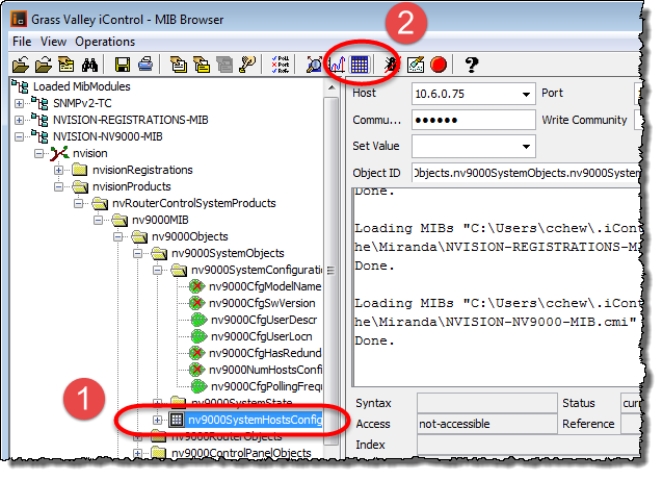
7. Select the table to which the object belongs, and then click the View SNMP data table button .
[ Graphic ]
8. When the SNMP Table window appears, click Start to populate the table.
9. Select the parameter you are interested in.
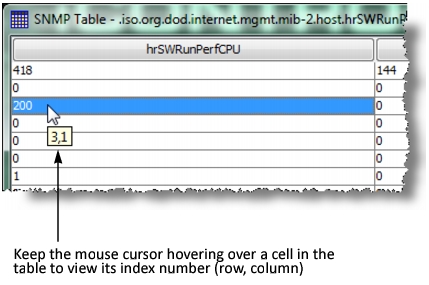
10. Take note of the index number (row, column) that appears.
[ Graphic ]
11. Close the SNMP Table window.
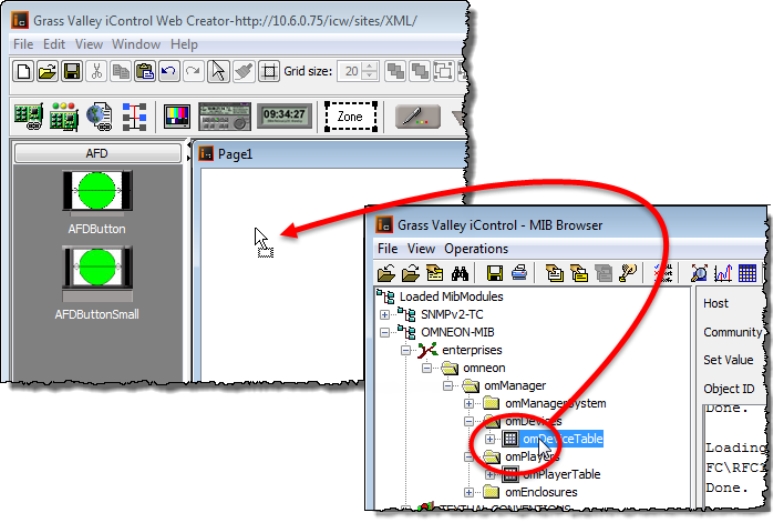
12. Click and drag the MIB parameter from the MIB Browser window onto the Web page.
[ Graphic ]
System Response: The corresponding alarm object appears on the Web page, showing the actual status of the MIB parameter.
NOTE: You may receive an error message. This is because the alarm object, by default, points to the index of the SNMP table, not the specific table entry. |
13. On iC Creator’s View menu, click Open alarm browser.
14. Scroll down to the SNMP folder. Click to expand its contents until you find the alarm corresponding to the new Web page object (in the Scripts folder). Select this object, and then click Edit plug-in.
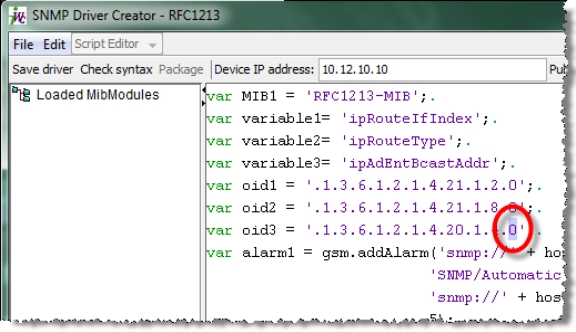
System Response: The SNMP Driver Creator window opens.
15. Change the last digit of the OID to the index number you determined in
step 10.
[ Graphic ]
Change this digit (circled) to the index (row) number of the SNMP table element
16. Edit the script as needed, and then click OK.
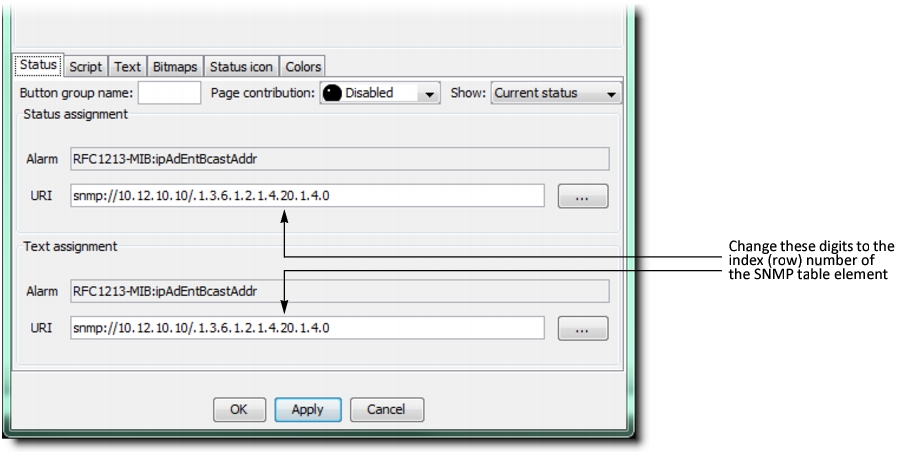
17. Double-click the alarm object on the Web page to open the
Status icon properties window. Change the last digit of both URIs to the index number you determined in
step 9.
18. Click OK.
[ Graphic ]
System Response: The object on the Web page is updated to reflect the changes.