EDIUS 7 Online Help
Reference ManualHardware Setup Guide
Installation Manual
User Guide
Set up display of the preview window.
Set the preliminary operation time during playback or playback operation.
|
[Preroll]
|
Set preliminary operation (preroll), for example, when playing back near the timeline cursor or when starting recording on a voice recorder. |
|
[Continue Playback when Editing]/[Continue Playback when Adding to the Timeline from Player]/[Continue Playback when Trimming Clip]
|
Continue playback even when each editing operation is executed during timeline playback. |
|
[Show Correct Frame when Scrubbing]
|
Display the image of the specified frame at all times even while scrubbing (dragging the timeline cursor with the mouse). When this item is unchecked, some of the frame images are displayed skipped. This setting is effective when scrubbing MPEG files or Windows Media Video files. |
|
[Combine Filter Layers and Track Layers (for effect settings)]
|
Check this item to display composite clips to which effects are applied when previewing in the effect setting dialog box. For example, if this item is checked, the composite image of V1 and V2 video will be displayed when you open the setting dialog box for the video filter that is applied to the V1 track after placing clips in the V1 and V2 tracks. If this item is unchecked, only the image of the V1 track is displayed. |
|
[Output Timecode]
|
Select the timecode that is output when outputting files or tapes. |
|
[Source Timecode Priority]
|
When the source timecode is output or displayed, set the track to display the timecode for from the tracks that have clips with timecode information placed on them, including T tracks. [Upper Track]
 [Lower Track]
 |
|
[Source audio pass through and ancillary data priority]
|
When exporting audio bitstream or ancillary data (including closed caption), set the track to export from the tracks on which the clips with those information are placed (including T track). * The ancillary data playback is supported only when STORM 3G ELITE or STORM 3G is used. |
 Note
NoteEven when [Lower Track] is selected in [Source Timecode Priority], the source timecode of the lower track is not displayed if the transparency of the upper track is not set (i.e. transparency is 100%).
You can continue to set other items by clicking [Apply].
Set the display content in full screen view on the monitor or in stereoscopic edit mode.
Once the display content of each monitor is set, no further setting is needed from the next time.
|
[No.]
|
Enter the monitor number. Monitor numbers from “2” onwards are external monitors. |
|
[Full Screen Preview Contents]
|
[Full Screen Preview Contents]
Displays content of the full screen view. Click the list to display a menu and change display content for each monitor. [No full screen preview]
Disable the full screen view. [Player/Multicam Source]
Display the Player screen in full screen view. In the multicam mode, the videos of each track with camera assigned are displayed in full screen view. [Recorder/Selected Camera]
Display the Recorder screen in full screen view. In the multicam mode, the video of the selected camera is displayed in full screen view. [Auto]
Display the same screen as video output in full screen view. |
|
[Stereoscopic flip horizontal]
|
Check this item to display video with the L side (for left eye) and R side (for right eye) swapped. |
|
[Using NVIDIA 3D VISION/Intel InTru 3D]
|
If your system supports NVIDIA 3D VISION or Intel Intru 3D, check this item to enable the stereoscopic view ([L/R Dual Stream]) using NVIDIA 3D VISION or Intel Intru 3D on the primary monitor. |
|
[Monitor Check]
|
Click this item to display the monitor number on the respective monitor. |
NoteNVIDIA 3D VISION or Intel Intru 3D can be used only in D3D full screen mode.
It takes a while to display the stereoscopic video on the monitor.
3D VISION is applied only to the primary monitor.
You can continue to set other items by clicking [Apply].
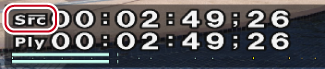
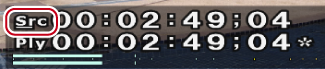
Set display of the timecode and level meter on the status area.
|
[Show Normal Edit]/[Show Trim]/[Show Export]
|
Check the timecodes or information to display at each operation. |
|
[View]
|
[Position]
Click the display position inside the monitor on the status bar to select the position. [Size]
Select the font size of the status bar. [Background]
Check this item to display the background on the status bar display area. |
|
[Select Source Information]
|
For captured clips, display information such as recording date. Select the information to display from the list. |
|
[Show Level Meter]
|
Switch the show/hide setting for the level meter. Click [Default] to return to the default settings. [Color and Threshold]
Set the color and threshold value of the level meter. Click a color sample to open the [Color Select] dialog box. [Invert Meter at Peak]
Select whether to invert the level meter when it peaks. |
You can continue to set other items by clicking [Apply].

The source timecodes of muted tracks are not displayed.
Set preroll and postroll when editing preroll.
The [User Settings] dialog box appears.
|
[Preroll Time]
|
Set the preliminary operation time (preroll) when editing preroll. |
|
[Postroll]
|
Set the preliminary operation time (postroll) when editing preroll. |
Previewing Cut Switch Points (Preroll Edit (Preview))
Placing Clips while Checking Cut Switch Points (Preroll Edit (Rec))
You can continue to set other items by clicking [Apply].
Set the screen refresh rate, zebra preview (warning indication for brightness level) and display of the safe area.
|
[Update Frequency]
|
Set the refresh rate for the video preview screen. When displaying interlaced images, movement of subjects may be smoothed and accidents (such as reversed field orders) can then be checked visually by refreshing the screen at the field rate (twice as fast as the frame rate). (There is no difference between both settings when displaying progressive images.) [Field]
For example, in the case of 29.97 fps frame rate, the screen is refreshed 59.94 times per second. [Frame]
For example, in the case of 29.97 fps frame rate, the screen is refreshed 29.97 times per second. |
|
[Zebra Preview]
|
A striped pattern is displayed at relevant parts of the screen when the brightness level set at this item is exceeded. [Over]
Set the upper limit of the brightness level. Select [Color] of the stripe pattern that is displayed when the upper limit of the brightness level is exceeded. [Under]
Set the lower limit of the brightness level. Select [Color] of the stripe pattern that is displayed when the lower limit of the brightness level is exceeded or brightness falls to 0 IRE or below. |
|
[Show Safe Area]
|
Display the safe area on the Player and Recorder. Switch the show/hide setting for [Action Safe] and [Title Safe]. The action safe area can be set as desired. [Guide Lines for 16:9 Monitor]
Select the guideline to display when the frame aspect ratio of the video is 16:9. When [Darken the Outside] is checked, the outside of the guideline is displayed darker. |
You can continue to set other items by clicking [Apply].
