You can jump to In and Out points on the timeline.
1) Click the [Set In] ([Set Out]) list button on the Recorder.

2) Click [Go to In Point] ([Go to Out Point]).
 Alternative
Click [Marker] on the menu bar, and click [Go to In Point] ([Go to Out Point]).
Right-click the slider on the Recorder, and click [Go to In Point] ([Go to Out Point]).
Right-click the time scale, and click [Go to In Point] ([Go to Out Point]).
Right-click the timeline cursor, and click [Go to In Point] ([Go to Out Point]).
Jumping to the In and Out points on the timeline: [Q]/[W]
You can jump to a specified position on the timeline by entering the numerical values for the timecode at that position.
1) Click on the Recorder.
2) Enter the timecode with the numerical keypad on the keyboard.
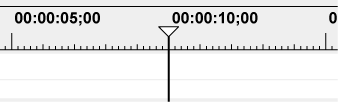
When “1000” is entered
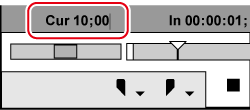
3) Press [Enter] on the keyboard.
The timeline cursor moves.

Enter “ + ” or “ - ” at the beginning of the number with the numerical keypad, and the timeline cursor will jump forward or backward by the entered number.
This function acquires the timecode of the frame displayed on the Player (or Recorder), and jumps to the position matching the timecode on the timeline (or Player). For example, you can use match frame when switching the video image of an interview to another video image of the same interview which was recorded from a different angle using 2 cameras, to smoothly switch the image cuts without any interruption in motion or sound. Match frame is available even for source video taken from equipment that can be controlled on a deck.
After acquiring the timecode of the clip displayed on the Player, jump to the corresponding position on the timeline clip and display it on the Recorder.
The timeline cursor is jumped to the timeline position matching the timecode of the specified source.
1) Play back a clip on the Player, and display the frame to be jumped to.
2) Click [Match Frame (Player to Recorder)] on the Player.

The timeline cursor moves, and the matching frame is displayed on the Recorder.
Alternative
Jumping from Player to the timeline: [Ctrl] + [F]
By default, [Match Frame (Player to Recorder)] is not displayed. Before performing the operation, set to display the buttons on the Player.
Clips containing the timecode of the frame currently displayed on the Player can be searched in the bin by the following operation.
Click [Clip] on the menu bar, and click [Search Bin] → [Including Cursor (Player)].
Searching bin (Player TC): [Shift] + [Ctrl] + [F]
Display the matching frame of the source clip at the timeline cursor position on the Player.
Match frame is possible on decks if the source is from a deck, or match frame is possible on files if the source is a file.
1) Select the track where the target clip is placed.
2) Move the timeline cursor to display the frame to be jumped to on the Recorder.
3) Click [Clip] on the menu bar, and click [Match Frame] → [Display Source Clip].
The matching frame is displayed on the Player.
Alternative
Displaying source clip: [Alt] + [F]
When the source currently displayed on the Player is a file, [Match Frame (Recorder to Player)] performs match frame on that file. When the source is from a deck, match frame is performed on the deck.
When the source currently displayed on the Player is a file, [Match Frame (Recorder to Source)] displays the clip currently selecting match frame on the timeline, and performs match frame. When the source is from a deck, match frame is performed on the deck.
You can search for clips with timecodes of the timeline clips in the bin by the following operation. The [Search results] folder is created in the folder view of the bin.
Click [Clip] on the menu bar, and click [Search Bin] → [Including Cursor (Recorder)].
Searching clips at the timeline cursor position in the bin: [Shift] + [F]
The clip can be displayed on the Player by clicking and selecting the clip on the timeline and performing the following operation.
Click [Clip] on the menu bar, and click [Show in Player].
Displaying selected clip on the Player: [Shift] + [Y]
In scenes set with a transition, 2 clips overlap each other on the same track. To execute the match frame function on overlapping clips, you can set the clip to acquire the timecode in before or after the clip.
Switch to the gang mode to synchronize the cursor positions or In and Out points of the Player and the timeline.
Using the gang mode before preroll editing is useful in deciding the position where clips are placed on the timeline.
Previewing Cut Switch Points (Preroll Edit (Preview))
Placing Clips while Checking Cut Switch Points (Preroll Edit (Rec))
|
|
|---|
|
1) Click [Set Gang Mode] on the Player.
Each click switches the mode on and off.

By default, [Set Gang Mode] is not displayed. Before performing the operation, set to display the buttons on the Player.
1) Move the slider on the Player to the position to be synchronized.
2) Move the timeline cursor to the position to be synchronized.
3) Click the [Set Gang Mode] list button on the Player.

4) Confirm that [Cursor] is checked.
5) Switch to the gang mode.
The cursors of the Player and the timeline are synchronized based on the current cursor position. The cursor positions to be synchronized can be changed by the following operation. After unchecking [Cursor] and moving the cursor of the Player or the timeline, check [Cursor] again.
1) Set the In (Out) point on the Player to the position to be synchronized.
2) Set the In (Out) point on the timeline to the position to be synchronized.
3) Click the [Set Gang Mode] list button on the Player.
4) Click [In] ([Out]) to check the item.
5) Switch to the gang mode.
The In (Out) points of the Player and the timeline are synchronized based on the current In (Out) point position. The In (Out) point positions to be synchronized can be changed by the following operation. After unchecking [In] ([Out]) and changing the In (Out) point of the Player or the timeline, check [In] ([Out]) again.

