Merging clips into group
You can create groups and merge clips into a group before importing. This allows operators to create groups of clips, name them, and then import them without having to repeat multiple imports separately.
- Highlight clips that you want to merge into a group.
-
Right-click and select
Add to Merge Group.
You can choose to create a new group or use existing group names from the context menu.
If the Merge On Import option is selected in the RMI User Preferences settings, all clips will be merged into a single clip on every import.
-
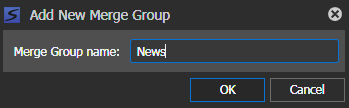
If you want to create a
new group, select
Add New Merge Group and enter the group name.
If the Automatically add keywords for merged imports option is selected in the RMI User Preferences settings, keywords will be added automatically to merged imports. Marker permissions must be set to Allow for keywords to be added successfully. Without full permissions, no keywords will be added to merged assets.
- Click OK.