EDIUS 7 Online Help
Reference ManualHardware Setup Guide
Installation Manual
User Guide
This section explains the overall EDIUS screen configuration as well as each window and palette.
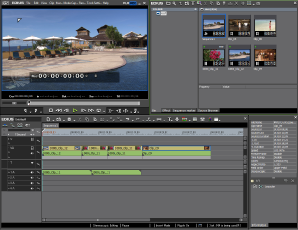
Various windows are displayed when using EDIUS, and basically you use 7 windows for editing video. You can easily edit video in dual monitor, as each window can be placed without overlapping with each other.
Each window can be resized by dragging its side line or the corner edge. As the windows snap to each other, you can place windows aligned by side line or corner edge. The window layout can also be saved.
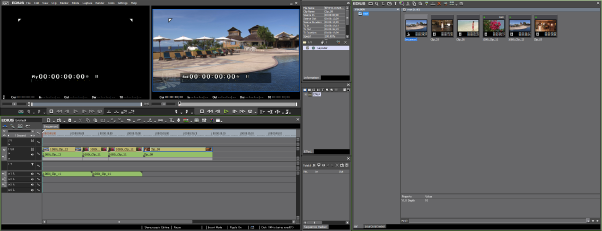

When multiple windows are placed in alignment, all the snapped windows can be resized at one time by resizing one of them. Resize operation with [Shift] on the keyboard held down resizes only the selected window. However, this function may be unable depending on the setting of Windows.
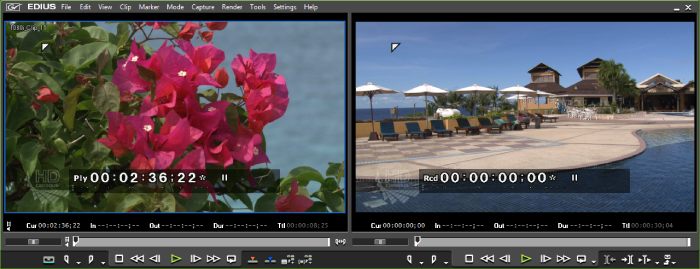
The following explains about 2 types of the preview windows, Player and Recorder.
Switching Between Single Mode/Dual Mode
Player appears on the left, and Recorder on the right in the dual mode.
In the single mode, switch the display window by clicking [Change to Player]/[Change to Recorder].
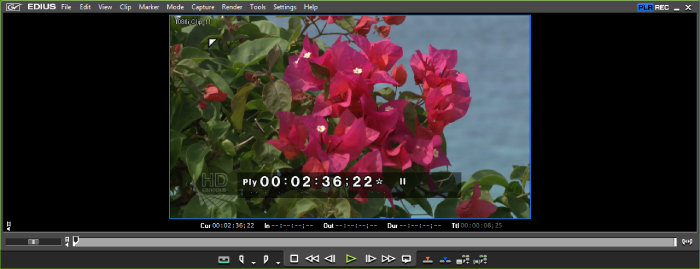
Click the GV icon  in the preview window to minimize the window.
You can execute most of the operations from the menu bar. Click and select an item.

Click [Help] on the menu bar, and click [User Registration] to perform user registration after installation.
Click [Help] on the menu bar, and click [Serial number registration] to register the serial number. After registering the serial number, restart EDIUS to enable the functions.
Perform the following procedure to refer to Help for how to use the application:
Click [Help] on the menu bar, and click [Help].
Help: [F1]
Click [Help] on the menu bar, and click [Version Info] to refer to the version information.
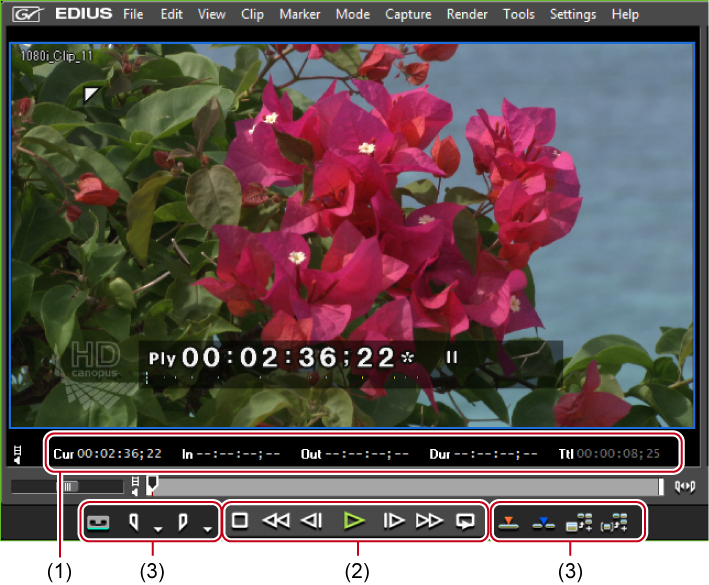
This window is used to playback the source clips and to capture the source from external devices.
|
(1)
|
Timecode area
|
Display the playback position, In point, Out point, duration and the total length of the source data. If the setting is defined incorrectly, such as the setting that Out point is set before In point, the timecode turns red. The value can be changed by clicking the timecode. Copy and paste are also available by right-clicking the timecode. |
|
(2)
|
Buttons for playing a source
|
Used for playing clips and controlling external devices (play, fast forward, stop, etc.). |
|
(3)
|
Buttons for editing a source
|
Used for setting In and Out points, adding a clip to the timeline, capturing, or creating a subclip. |
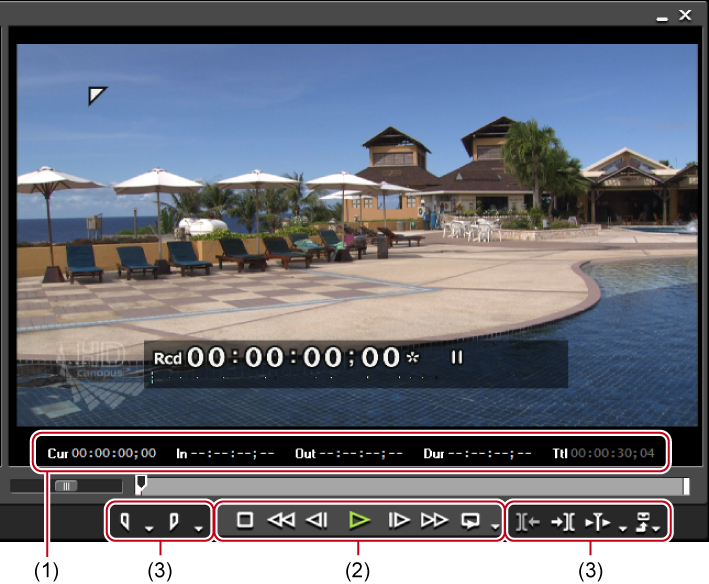
This window is used to play the timeline or edit a clip.
|
(1)
|
Timecode area
|
Display the playback position, In point, Out point, duration and the total length of the source data. If the setting is defined incorrectly, such as the setting that Out point is set before In point, the timecode turns red. The value can be changed by clicking the timecode. Copy and paste are also available by right-clicking the timecode. |
|
(2)
|
Buttons for playing the timeline
|
Used for controlling clips placed on the timeline (playback, fast forward, stop, etc.). |
|
(3)
|
Buttons for editing the timeline
|
Used for setting In and Out points, jumping to the edit point (the border of clips), or exporting to file or tape. |
This window is used to place the clips on the track or apply effects.
Clips are placed from left to right of the timeline in time series.

|
(1)
|
Mode bar
|
These buttons are used to switch the editing modes. The button types and sort order can be customized. |
|
(2)
|
Sequence tab
|
Tab for using clips on the timeline as a set |
|
(3)
|
Operation buttons
|
These buttons are used for editing operations. The button types and sort order can be customized. |
|
(4)
|
Time scale
|
Indicate the scale for the time on the timeline. |
|
(5)
|
Time scale settings
|
Change the display unit for time scale. |
|
(6)
|
Track header
|
Configure various settings including muting and locking each track, mapping channels, synchronizing channels. It can be used to add and delete tracks. |
|
(7)
|
Timeline
|
Place clips in this area. It can also be used to add and delete tracks. |
|
(8)
|
Status bar
|
Display the number of imported files when a project is opened/number of all files, the number of offline clips, clip playback status, editing mode, and background job status, etc. Move the cursor over the mode bar or timeline operation buttons to display the button names on lower left. |
|
(9)
|
Timeline cursor
|
Indicate the playback position or edit position of the timeline. |
|
(10)
|
Video part
|
Indicate the presence of video in the clip. |
|
(11)
|
Audio part
|
Indicate the presence of audio in the clip. Expand it to display a rubber band to adjust the volume or pan. |
|
(12)
|
Mixer area
|
Configure keying and other settings. |
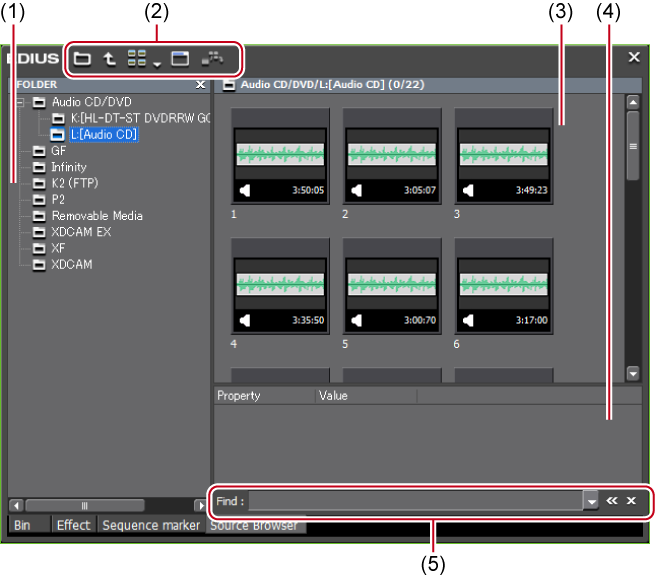
This window is used to manage clips imported with EDIUS.
You can switch the show/hide setting for the folder view. You can switch the display method such as thumbnail, detailed information, and other information for the clip view.
Management, display of the list, and search for captured clip are available.
Clip information (such as aspect ratio, frame rate, poster frame) can be checked or modified.

|
(1)
|
Folder view
|
Display folders in tree structure. |
|
(2)
|
Operation buttons
|
Perform various operations. |
|
(3)
|
Clip view
|
Display clips in the folder as a list. |
|
(4)
|
Metadata view
|
Display the clip metadata in a list. |
|
(5)
|
Simple search bar
|
Press [F3] on the keyboard to display this bar. Clips in this folder can be searched. |
The upper and lower parts of the bin window are extended, by every double-click on a position of the title bar (without any button) in the bin window.

This window is used to check source files in external devices such as CD/DVD and AVCHD cameras to which file-based video or audio is recorded.
You can switch the show/hide setting for the folder view. You can switch the display method such as thumbnail, detailed information, and other information for the clip view.
Display of the list, transfer to the bin, and search for the sources in external devices are available.
|
(1)
|
Folder view
|
Display devices and drives connected to the PC in a tree. When the media is inserted into the device or drive, the media name is displayed in the tree. Click the media name to display the stored files in the clip view. To browse the local disk, you can register the folder to display in the folder view through System Settings in advance. |
|
(2)
|
Operation buttons
|
Perform various operations. The button types and operations differ from device to device. |
|
(3)
|
Clip view
|
Displays a list of source files in the external devices. |
|
(4)
|
Metadata view
|
Display a list of source file metadata. |
|
(5)
|
Simple search bar
|
Press [F3] on the keyboard to display this bar. Search source files in the external devices. |
The upper and lower parts of the source browser window are extended, by every double-click on a position of the title bar (without any button) in the source browser window.

There are 3 types of palettes: Information palette, Effect palette, and Marker palette.
Showing/Hiding [Information] Palette
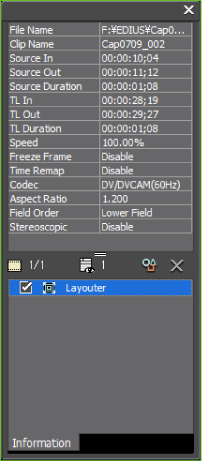
Display the information of the clip placed on the timeline.
Display information on the set effects and set whether to apply effects or the order.
Adjust the set effects.
Configure the video layout if a clip has a video part.
Showing/Hiding [Effect] Palette
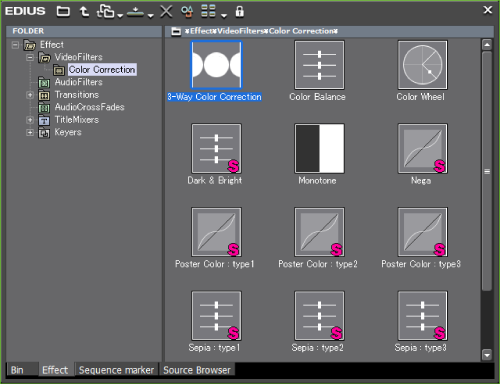
Video or audio effects to add to clips are registered.
Register or delete customized effect.
Manage the sequence markers appended to the timeline and clip markers appended to a clip. The [Sequence Marker] and [Clip Marker] lists can be switched by clicking the button.

Displaying the [Sequence Marker] List
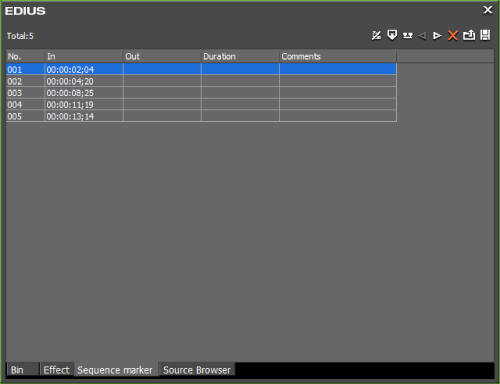
Set and delete a sequence marker.
Jump to a desired sequence marker or add comments.
Import or export a sequence marker list.
Displaying the [Clip Marker] List

Set and delete a clip marker.
Jump to a desired clip marker or add comments.
Import or export a clip marker list.
Follow the step below to show/hide 3 palettes together.
Click [View] on the menu bar, and click [Palette] → [Show All] ([Hide All]).
Displaying all: [H]
You can combine 3 palettes into 1 palette. All palettes can be combined to the bin window or the source browser window.
Every double-click on the title bar of a palette expands and contracts the palette vertically.

