1) Click the star mark on the upper left of the thumbnail in the thumbnail pane.
The clip is registered to [Favorites].
Click the star mark again to unregister it from [Favorites].
 Alternative
Drag and drop the clip in the thumbnail pane to the [Favorites] on the sidebar.

The number of star marks can be changed by clicking the star mark in the properties. Star marks can be set up to 5, and clips can be searched by the number of the stars.
You can use the [Catalog] function to group the registered clips.
Grouping by [Catalog] can be used as it is on the source browser.
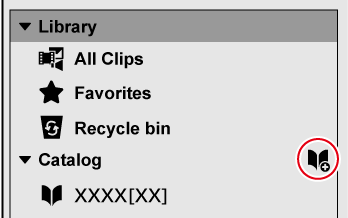
1) Click the icon on the right edge of [Catalog] on the sidebar.

A new catalog is created.
To delete a catalog, click the catalog you want to delete or click
 on the right edge of the catalog, and then click [Delete].
To change the catalog name, click the catalog name.
1) Drag and drop a clip in the thumbnail pane to the catalog.
The clip is registered to the catalog.
The clips registered to the catalog are displayed with green square marks at the lower right of the thumbnails. (For [Thumbnail] view or [Timeline] view only)
You can use refined search for searching in more detailed conditions.
1) Click the magnifier icon on the left of the search bar.

The advanced search box is displayed. After you have set search conditions, clips that meet the search conditions are retrieved automatically.
Click
 on the right of the advanced search box to add search conditions.
You can register them to [Smart Catalog] by clicking [Save as smart catalog].

[Smart Catalog] is a function for grouping clips searched by refined search conditions. Multiple search conditions can be combined, and specific grouping can be performed. Since all clips registered in [Library] are always targeted for the search, when a new clip that meets the set search conditions is registered, it is automatically registered to [Smart Catalog].
Grouping by [Smart Catalog] can be used as it is on the source browser.
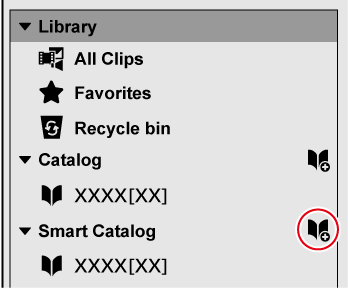
1) Click the icon on the right edge of [Smart Catalog] on the sidebar.

A new smart catalog is created. If you set search conditions, clips that meet the search conditions are automatically collected.
Click
 on the right of the advanced search box to add search conditions.
Right-click a smart catalog name or click
 on the right edge of the smart catalog name to edit a search condition or delete a smart catalog.
To change the smart catalog name, click on the smart catalog name.
If a source registered to [Library] is moved or renamed, the link between GV Browser and the source will be lost, and the clips will become offline clips. This section describes the method to support restoration of an offline clip.
1) Click [Edit] on the menu bar, and click [Search offline clips].
Offline clips are searched, and [Offline clips] will be created in the [Library] of the sidebar. Click [Offline clips] to display offline clips in the thumbnail pane.
Offline clips are displayed with red circle marks at the lower right of the thumbnails in the thumbnail pane.
2) Right-click an offline clip in the thumbnail pane, and click [Restore offline clip].
The [Restore offline clip] dialog box appears.
3) Click [...] in [Target file path].
The [Restore offline clip] dialog box appears.
To specify a folder and search for a source with an identical name in the specified folder and its sub folders, click [Search Folder].
4) Select a source, and click [Open].
If [Search Folder] has been clicked in step 3) , specify a folder to search, and click [Browse folder].
If the offline clip matches the selected file, a check mark appears on [Consistency].
5) Click [Start].
GV Browser and the source are re-linked.
When re-linking has been succeeded, a check mark appears on [Restore], and the red circle displayed on the thumbnail in the thumbnail pane disappears.
6) Click [Close].
The [Restore offline clip] dialog box is closed.

When specifying a folder to search, you can select multiple offline clips in step 2) to search at once.
Export a still image on a desired position of a video with the resolution of the source maintained.
Confirm the frame to be exported in the preview pane. Click [View] on the menu bar, and click [Preview] to display the preview pane in advance.
1) Click a thumbnail in the thumbnail pane.
A preview of the video is displayed in the preview pane.
2) Display the frame to be exported as a still image in the preview pane.
When displaying the frame, use keyboard shortcuts for effective operation.
3) Click [File] on the menu bar, and click [Save as still image].
The still image is registered to [Library].
 Alternative
Saving as still image: [Ctrl] + [T]

The still image is saved in the “Snapshot” folder set in [Import] in the [Settings] dialog box → [Import To].
The settings when exporting still images can be changed by [General] in the [Settings] dialog box → [Snapshot].
You can upload files to a video-sharing website such as YouTube, Vimeo, etc. You can also register FTP settings to upload files to a server.
Uploading a file to YouTube
1) Click [Settings] on the tool bar, and click [Share].
The [Share] dialog box appears.
2)
Click
 , and click [YouTube Uploader].
Follow the on-screen instructions to configure the setting. When the setting completes, [YouTube Uploader] appears in [Account] of the [Share] dialog box.
Close the [Share] dialog box.
3) Right-click on the video clip to upload, and click [Upload].
YouTube Uploader starts up.
When multiple YouTube accounts are set, select a YouTube account to be used for upload.
 Alternative
Select the video clip to upload, click [File] on the menu bar, and click [Upload].
4) Set the item such as title, and click [Upload].
A dialog box for uploading process appears near the task tray to indicate the upload progress.
The YouTube icon is displayed in the properties of clips that have been uploaded successfully. Click the YouTube icon to display the URL of the video on the browser.