To import files saved on external devices in which file-based video or audio are recorded (e.g. AVCHD video camera, professional-use video camera, removable media such as SD memory card, XDCAM EX device) to EDIUS, perform the operations with the source browser.
Sources imported from the source browser are registered to the current folder on the bin at the same time that they are transferred to hard disk on the PC.

You can set the transfer destination used when importing files by clicking [Application] in [System Settings] → [Source Browser].
Source files can be imported easily from AVCHD video camera/removable media/XDCAM EX/P2/XDCAM/XF devices using the source browser.
Files can be checked immediately or transferred in the background by simply connecting a device or drive to your PC and inserting the storage media.
If you use Mync bundled with EDIUS, you can import clips registered in Mync or storyboards created with Mync to EDIUS.
When importing XDCAM sources or K2 sources via the FTP server, set the FTP server connection settings in the system settings in advance to import sources easily from the source browser.
K2 sources copied to the hard disk on the PC can be converted to MXF files using the source browser.
When each of the sources has been copied to the hard disk with the folder structure held intact, the sources can be imported simply from the source browser if the reference folder is set up in the system settings in advance.
Sources can be imported from an AVCHD video camera or removable media such as SD memory card, memory stick and BD. Sources are registered to the bin at the same time that they are transferred to the PC.
Connect an AVCHD video camera or removable media to the PC, and check that the power is turned on. For more information on connection methods, see the manual for your device.
Sources can be imported in the same way even when files on devices have been copied to the hard disk on the PC with the folder structure held intact.
Supported formats are AVCHD, BD, SD-Video, Memory Stick Video, and DCF (still images saved in digital camera file format). Only the BDMV format is supported for BD.
|
|
|---|
|
1) Click the [Removable Media] tree in the folder view of the source browser.
The drive connected to your PC is recognized, and is displayed in the folder view tree.
2) Insert the storage media into the drive.
3) Click the media name.
Information on the media is displayed in the clip view.
Folders are sometimes categorized by type in the layer under the drive depending on the connected device.
When files in the AVCHD video camera or removable media have been copied to the hard disk on the PC, right-click [Removable Media], and click [Open Folder] to specify the reference destination.
References can be deleted from the tree display by right-clicking a folder and clicking [Delete] only when they have been added from the tree display in the source browser. Actual folders are not deleted.
To update the information on media, right-click [Removable Media] and click [Refresh].
4) Select the file to import, and click [Add and Transfer to Bin] in the source browser.

Data transfer to the PC is started in the background at the same time that the file is registered to the bin as a clip.
 Alternative
Right-click the file to import, and click [Add and Transfer to Bin].
Register sources to the bin at the same time that they are transferred to the PC from SxS memory card.
Connect the XDCAM EX device to the PC, and check that the power is turned on.
Sources can be imported in the same way even when files on SxS memory cards have been copied to the hard disk on the PC with the folder structure held intact.
Sources in XDCAM EX 3D format can also be imported.
For sources recorded across multiple SxS memory card as a sequence clip, connect all sources to PC or import the folder in which the contents of the SxS memory cards are copied to the source browser, and register sources in the order from the first SxS memory card to the bin. Each clip is linked and registered as a sequence clip to the bin.
1) Click the [XDCAM EX] tree in the folder view of the source browser.
2) Click the drive.
Information on the SxS memory card is displayed in the clip view.
When files on the SxS memory card have been copied to the hard disk on the PC, right-click [XDCAM EX], and click [Open Folder] to specify the reference.
References can be deleted from the tree display by right-clicking a folder and clicking [Delete] only when they have been added from the tree display in the source browser. Actual folders are not deleted.
To update the information of the device, right-click [XDCAM EX] and click [Refresh].
3) Select the clip to import, and click [Add and Transfer to Bin] in the source browser.
Data transfer to the PC are started in the background at the same time that the clip is registered to the bin.
Alternative
Right-click the clip to import, and click [Add and Transfer to Bin].
Take clips are registered to the current folder of the bin as a sequence clip.
Download GXF files on the K2 Media server via FTP, convert them to MXF files for import, and register them to the bin.
|
|
|---|
|
1) Click the [K2 (FTP)] tree in the folder view of the source browser, and click a connection destination.
Information on the server is displayed in the clip view.
To update the information of the server, right-click the connection destination, and click [Refresh].
2) Select and right-click the clip to import, and click [Add and Transfer to Bin].
Data transfer to the hard disk and conversion are started in the background at the same time that the clip is registered to the bin.
During transfer and conversion of the clip, the letter [H] is displayed on the clip icon in the bin.
The clip can be edited with EDIUS even during transfer and conversion.
If [Allows Users to Rename/Delete Clips.] is checked in the K2 browser settings, the following operations can be performed in the clip view of the source browser.
Click a clip name and rename it.
Right-click a clip and click [Delete] to delete it.
|
|
|---|
|
Convert K2 sources copied to the hard disk on the PC to MXF files, and register them to the bin.
1) Click the [K2 (FTP)] tree in the folder view of the source browser.
2) Click [Convert file(s)] in the source browser.
 Alternative
In the folder view of the source browser, right-click [K2 (FTP)], and click [Convert file(s)].
3) Select a GXF file, and click [Open].
Multiple GXF files can also be selected.
Conversion to the MXF file is started in the background at the same time that the clip is registered to the bin.
The clip can be edited with EDIUS even during conversion.
Register P2 sources to the bin at the same time that they are transferred to the PC.
Connect the P2 device to the PC, and check that the power is turned on.
P2 sources copied to the hard disk on the PC also can be imported in the same way. Copy sources with the folder structure in the device held intact.
Sources in 3D P2 format can also be imported. Insert two P2 cards into the slot.
|
|
|---|
|
1) Click the [P2] tree in the folder view of the source browser.
2) Click the drive or reference folder.
The P2 sources are displayed in the clip view.
Reference folders can be temporarily added in the folder view of the source browser. Right-click [P2] and click [Open Folder].
When references have been temporarily added in the source browser, they can be deleted by right-clicking a folder and clicking [Delete]. Actual folders are not deleted.
To update the information of references, right-click [P2] and click [Refresh].
3) Select the clip to import, and click [Add and Transfer to Bin] in the source browser.
Data transfer to the PC will be started in the background at the same time that the clip is registered to the bin.
Alternative
Right-click the clip to import, and click [Add and Transfer to Bin].
Clip names registered to the bin are “user clip name” when a user clip name has been set to the P2 clip, and “clip name” when a user clip name has not been set.
When editing with EDIUS, P2 clips can be used in the same way as AVI clips. When editing from hard disk, realtime performance becomes the same as that of AVI files of the same format. When editing directly from the P2 drive, performance becomes 2 stream realtime in the case of DV, and 1 stream realtime in the case of DVCPRO50. (The above performances are based on the measurement by Grass Valley. CPU performance varies depending on your system.)
Partial transfer is available, where In and Out points are set to files on the P2 device and only required parts are transferred to the hard disk.
Register XDCAM sources to the bin at the same time that they are transferred to the PC.
Before importing sources from an XDCAM device, connect the XDCAM device to the PC, and check that the power is turned on.
XDCAM sources copied to the hard disk on the PC and proxy clips recorded on USB memory also can be imported in the same way. When copying sources to hard disk on the PC, copy sources with the folder structure in the device held intact.
Import settings can be checked and changed by [Importer/Exporter] in [System Settings] → [XDCAM] → [Browser].
The SAM mode is supported.
|
|
|---|
|
1) Click the [XDCAM] tree in the folder view of the source browser.
2) Click the drive or reference folder.
The XDCAM sources are displayed in the clip view.
Reference folders can be temporarily added in the folder view of the source browser. Right-click [XDCAM] and click [Open Folder].
When references have been temporarily added in the source browser, they can be deleted by right-clicking a folder and clicking [Delete]. Actual folders are not deleted.
To update the information of references, right-click [XDCAM] and click [Refresh]. If it takes time to display the thumbnail for a clip, press [Esc] on the keyboard to stop refreshing of the list.
3) Select the clip to import, and click [Add and Transfer to Bin] in the source browser.
Data transfer to the PC is started in the background at the same time that the clip is registered to the bin.
The clip can be edited with EDIUS even during transfer.
Alternative
Right-click the clip to import, and click [Add and Transfer to Bin] → a clip type.
Partial transfer is available, where In and Out points are set to files on the XDCAM device and only required parts are transferred to the hard disk. A message will appear if no connection has been made to the directory where the high-resolution data is saved when partial transfer is performed on the XDCAM clip. Insert the disk, and click [OK].
Import XDCAM sources via FTP, and register them to the bin.
Import settings can be checked and changed by [Importer/Exporter] in [System Settings] → [XDCAM] → [Browser].
|
|
|---|
|
1) Click the [XDCAM] tree in the folder view of the source browser.
2) Click the server.
Information on the server is displayed in the clip view.
To update the information of the server, right-click the connection destination, and click [Refresh].
3) Select the clip to import, and click [Add and Transfer to Bin] in the source browser.
Data transfer to the PC starts in the background at the same time that the clip is registered to the bin.
The clip can be edited with EDIUS even during transfer.
Alternative
Right-click the clip to import, and click [Add and Transfer to Bin] → a clip type.
Partial transfer is available, where In and Out points are set to XDCAM files on the server and only required parts are transferred to the hard disk. A message will appear if no connection has been made to the directory where the high-resolution data is saved when partial transfer is performed on the XDCAM clip. Set up the FTP connection, and click [OK].
Data transfer to the hard disk on the PC is started at the same time that XDCAM clips on the FTP server or clips on XDCAM devices are placed directly on the timeline without being registered to the bin. The data (proxy/high-resolution) transferred at this time can be checked and changed by [Importer/Exporter] in [System Settings] → [XDCAM] → [Download] in [Browser].
|
|
|---|
|
1) Set the channel mapping for the tracks on which clips are placed.
2) Move the timeline cursor to the position to place the clip.
3) Click the [XDCAM] tree in the folder view of the source browser.
4) Click the drive or connection destination.
5) Select a clip, and click [Add to Timeline] in the source browser.
 Alternative
Right-click the clip to import, and click [Add to Timeline] → an item.
Register RED sources to the bin at the same time that they are transferred to the PC.
Connect the RED device to the PC, and check that the power is turned on.
RED sources copied to the hard disk on the PC also can be imported in the same way. Copy sources with the folder structure in the device held intact.
|
|
|---|
|
1) Click the [RED] tree in the folder view of the source browser.
2) Click the drive or reference folder.
The RED sources are displayed in the clip view.
Reference folders can be temporarily added in the folder view of the source browser. Right-click [RED] and click [Open Folder].
When references have been temporarily added in the source browser, they can be deleted by right-clicking a folder and clicking [Delete]. Actual folders are not deleted.
To update the information of references, right-click [RED] and click [Refresh].
3) Select the clip to import, and click [Add and Transfer to Bin] in the source browser.
Data transfer to the PC will be started in the background at the same time that the clip is registered to the bin.
Alternative
Right-click the clip to import, and click [Add and Transfer to Bin].
You can register Cinema RAW or Cinema RAW Light sources to the bin at the same time that they are transferred to the PC.
This section explains the procedure to import a Cinema RAW source. Perform the same procedure to import a Cinema RAW Light source.
Connect the Cinema RAW device to the PC, and check that the power is turned on.
Cinema RAW sources copied to the hard disk on the PC also can be imported in the same way. Copy sources with the folder structure in the device held intact.
|
|
|---|
|
1) Click the [Cinema RAW] tree in the folder view of the source browser.
2) Click the drive or reference folder.
The Cinema RAW sources are displayed in the clip view.
Reference folders can be temporarily added in the folder view of the source browser. Right-click [Cinema RAW] and click [Open Folder].
When references have been temporarily added in the source browser, they can be deleted by right-clicking a folder and clicking [Delete]. Actual folders are not deleted.
To update the information of references, right-click [Cinema RAW] and click [Refresh].
3) Select the clip to import, and click [Add and Transfer to Bin] in the source browser.
Data transfer to the PC will be started in the background at the same time that the clip is registered to the bin.
Alternative
Right-click the clip to import, and click [Add and Transfer to Bin].
Register Sony RAW sources to the bin at the same time that they are transferred to the PC.
Connect the Sony RAW device to the PC, and check that the power is turned on.
Sony RAW sources copied to the hard disk on the PC also can be imported in the same way. Copy sources with the folder structure in the device held intact.
|
|
|---|
|
1) Click the [Sony RAW] tree in the folder view of the source browser.
2) Click the drive or reference folder.
The Sony RAW sources are displayed in the clip view.
Reference folders can be temporarily added in the folder view of the source browser. Right-click [Sony RAW] and click [Open Folder].
When references have been temporarily added in the source browser, they can be deleted by right-clicking a folder and clicking [Delete]. Actual folders are not deleted.
To update the information of references, right-click [Sony RAW] and click [Refresh].
3) Select the clip to import, and click [Add and Transfer to Bin] in the source browser.
Data transfer to the PC will be started in the background at the same time that the clip is registered to the bin.
Alternative
Right-click the clip to import, and click [Add and Transfer to Bin].
Partial transfer is available, where In and Out points are set to files on the Sony RAW device and only required parts are transferred to the hard disk.
Register XF sources to the bin at the same time that they are transferred to the PC.
Connect the XF device to the PC, and check that the power is turned on.
XF sources copied to the hard disk on the PC also can be imported in the same way. Copy sources with the folder structure in the device held intact.
|
|
|---|
|
1) Click the [XF] tree in the folder view of the source browser.
2) Click the drive or reference folder.
The XF sources are displayed in the clip view.
Reference folders can be temporarily added in the folder view of the source browser. Right-click [XF] and click [Open Folder].
When references have been temporarily added in the source browser, they can be deleted from the tree display by right-clicking a folder, and clicking [Delete]. Actual folders are not deleted.
To update the information of references, right-click [XF] and click [Refresh].
3) Select the clip or playlist to import, and click [Add and Transfer to Bin] in the source browser.
Data transfer to the PC is started in the background at the same time that the clip or playlist is registered to the bin.
Alternative
Right-click the clip or playlist to import, and click [Add and Transfer to Bin].
Clips that have been recorded across multiple media are registered to the current folder on the bin as a sequence clip.
Partial transfer is available, where In and Out points are set to files on the XF device and only required parts are transferred to the hard disk.
Register file-based stereoscopic sources to the bin at the same time that they are transferred to the PC.
To import sources in 3D P2 format
1) Insert two P2 cards into the slot.
2) Click the [P2] tree in the folder view of the source browser.
3) Click the drive displayed as [Stereoscopic].
The stereoscopic sources are displayed in the clip view. The stereoscopic sources are marked with the “S” icon.
4) Select the clip to import in the [L] or [R] folder, and click [Add and Transfer to Bin] in the source browser.
Data transfer to the PC starts in the background at the same time that the stereoscopic clip is registered to the bin.
If sources are imported from the drive that is not displayed as [Stereoscopic], the L side or the R side source will be imported separately.
You can import clips registered to Mync or storyboards created with Mync to EDIUS.
You can register catalogs/smart catalogs whose clips have been grouped with Mync directly to the bin.
You can also start up Mync from the source browser.
For more information on how to operate, refer to the manual of Mync.
You can change the view of folders and clips on the source browser from [Importer/Exporter] in [System Settings] → [Mync].
|
|
|---|
|
The following explains how to check the progress of processing (background jobs) such as file transfer that is executed in the background and how to pause/restart processing.
The execution progress of background jobs can be checked on the status bar in the timeline window or the clip display.
The status bar displays the number of background jobs and an icon indicating the current state of background jobs.
This is displayed when a background job is executing. The icon is also displayed when EDIUS is executing an automatic process job such as creation of seek information.
This is displayed when there are no background jobs and when a background job has been canceled.
This is displayed when a background job is paused.

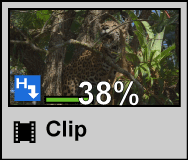
The icon indicating that the background job is executing is displayed, and progress is displayed as a progress bar and a percentage.
Clips registered in the bin are being transferred to the project folder.
In the [Background Job] dialog box, detailed transfer status can be checked, and the background jobs can be paused and deleted, for example.
1) Click [Show Background Job] in the source browser.

The [Background Job] dialog box appears.
Alternative
Click [View] on the menu bar, and click [Background Job].
|
|
|---|
|
|
Job list |
Displays jobs currently executing and waiting to be executed in a list. To cancel execution of a job, select the job and right-click, and click [Stop] or [Stop All]. To delete a job, select the job and right-click, and click [Delete]. To pause or resume execution of a job, select the job and right-click, and click [Pause] or [Restart]. |
|
[Pause Background Jobs During Playback] |
Check this item to pause the execution of the job while the Player or timeline is being played back. |
|
[Pause]/[Resume] |
Pause or resume execution of all jobs by selecting and clicking the jobs. |
|
[Close] |
Close the [Background Job] dialog box. Closing the dialog box will not affect the executing state of the background jobs. |

