Maintenance Procedures
Topics in this section include the following:
- "Cleaning the front panel touch screen"
- "Maintaining media with the Storage Utility"
- "Exporting log files"
- "Restoring the default system"
- "Replacing an iDDR"
- "Determining Turbo iDDR versions"
Cleaning the front panel touch screen
The front surface of the touch screen should be kept free of dirt, dust, finger prints and other materials that could degrade optical properties. Long term contact with abrasive materials will scratch the front surface, and image quality will be degraded. For best results, use a clean, damp, non-abrasive cloth towel and any commercially available window cleaner to regularly clean the surface. The cleaning solution should be applied to the towel rather than the surface of the touch screen. Do not flood the surface of the touch screen. Fluid ingress may occur from behind the panel and cause damage.
Maintaining media with the Storage Utility
The following procedures use the Storage Utility for operations on the file system, database, and media disks of the iDDR.
- "Opening and closing the Storage Utility"
- "Viewing the properties of a media disk"
- "Clearing media"
- "Checking and repairing media"
- "Defragmenting the media disk volume"
CAUTION: Use the Storage Utility only as directed by a documented procedure or by Grass Valley Support. If used improperly, the Storage Utility can render your iDDR inoperable or result in the loss of all your media.
Opening and closing the Storage Utility
The Storage Utility requires that the iDDR be in the proper startup mode. The iDDR can run in two different startup modes, as follows:
- Normal mode — In this mode AppCenter runs for normal operation of the iDDR. The Storage Utility cannot run in Normal mode.
- Storage Maintenance mode — In this mode the Storage Utility runs. AppCenter cannot run in Storage Maintenance mode. This means all media access operations are disabled while you are using the Storage Utility.
Both modes automatically log on using the following Windows user account:
You switch between these startup modes by opening and closing the Storage Utility, as explained in the following procedures.
CAUTION: The Turbo is not a general purpose Windows workstation. The Windows configuration on the iDDR has been specifically set for use as a real time device. The Turbo iDDR is configured for automatic logon allowing unattended booting. To avoid partial or total system failure, do not modify any operating system settings unless approved by Grass Valley, including but not limited to the following:
— Do not use the User Manager
— Do not use the Disk Administrator
— Do not load any third party software
— Do not install any Windows updates without contacting Grass Valley
Product SupportOpening the Storage Utility from Normal mode
- If you have not already done so, stop all record operations, play operations, and any other media access.
- Open the Storage Utility using one of the following:
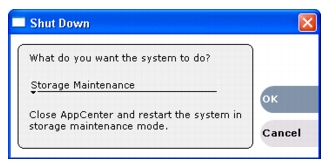
On the Shutdown dialog select Storage Maintenance and select OK. The iDDR restarts into Storage Maintenance mode.
- If AppCenter is not currently running, open the Storage Utility shortcut on the Windows desktop. A message appears.
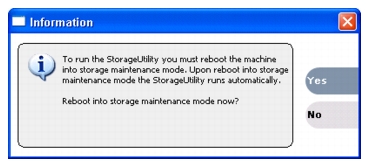
Select Yes to confirm the reboot into the Storage Maintenance mode.
If you get a message about restarting in Normal mode it means that you are already in Storage Maintenance mode. Refer to "Opening the Storage Utility from Storage Maintenance mode".
There can be a pause of several seconds before shutdown processes begin. Upon reboot into the Storage Maintenance mode the Storage Utility opens automatically.
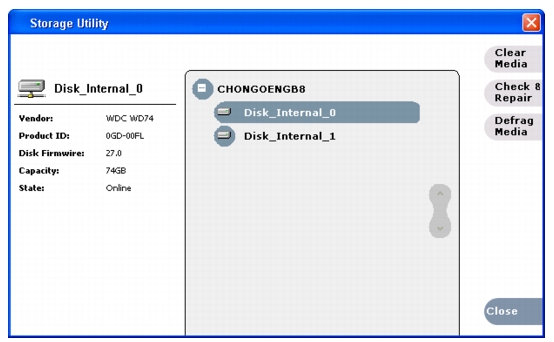
The Storage Utility detects disks available to the iDDR and lists them on the opening screen. Interpret Storage Utility disk names as follows:
Closing the Storage Utility
The Storage Utility only runs in Storage Maintenance mode, so if you are closing the Storage Utility you are already in Storage Maintenance mode.
- Complete all the service work that you need to do using the Storage Utility.
- On the Storage Utility window select Close.
A message appears that asks if you want to reboot.
- Answer the “…reboot?…” message as follows:
- Select Yes. In most cases this is the appropriate answer, given that your work with the Storage Utility is complete and you are ready to restart into Normal mode. When you select Yes a message appears that asks if you want to stay in Storage Maintenance mode after the restart. Continue with step 4 to answer the question.
- You can also select No if you have a reason to close the Storage Utility yet not restart. When you select No a message appears the advises you to restart into Normal mode later. The Storage Utility closes and the iDDR remains in Storage Maintenance mode.
- Answer the “…stay in storage maintenance…?” message as follows:
- Select No. In most cases this is the appropriate answer, given that your work with the Storage Utility is complete and you are ready to restart into Normal mode. When you select No the iDDR restarts into Normal mode. There can be a pause of several seconds before shutdown processes begin.
- You can also select Yes if you have a reason to restart yet remain in Storage Maintenance mode. When you select Yes the iDDR remains in Storage Maintenance mode after restart. If you subsequently do a standard Windows restart, the iDDR still restarts into Storage Maintenance mode.
To reboot into Normal mode you can open and close the Storage Utility, or attempt to open AppCenter and follow the prompts for rebooting into Normal mode.
Opening the Storage Utility from Storage Maintenance mode
If you previously had the Storage Utility running and then closed it while remaining in Storage Maintenance mode, you can open the Storage Utility shortcut on the Windows desktop. Also, if you are in Storage Maintenance mode and you restart the iDDR, the Storage Utility to opens automatically at startup.
Viewing the properties of a media disk
Use this procedure if you need to view the properties of a particular media disk.
- Open the Storage Utility as explained in "Opening and closing the Storage Utility".
- Select the disk for which you want to view properties. The properties appear in the Storage utility window.
Clearing media
You can erase all media from the Turbo iDDR and return the media disk volume to an empty state, as it was when you first got the iDDR from the factory.
CAUTION: You lose all existing media with this procedure.
To clear all media, do the following:
- Open the Storage Utility as explained in "Opening and closing the Storage Utility".
- Select Clear Media. A warning message appears informing you that you will lose all media.
- Click Yes to confirm. A progress indicator appears.
When the process to clear media is complete, an information message appears prompting you to restart the iDDR.
Checking and repairing media
This procedure does the following:
- Check and repair media database — This process allows you to keep the media database and the media files in sync. The Storage Utility checks the movies (clips) in the media database for the references to media files that should be currently stored on the media disks. If the Storage Utility finds any movies that refer to non-existent media files it deletes those movies from the media database. Likewise, the Storage utility checks for media files that are not referenced by a movie in the media database and deletes the unreferenced files as well.
- Check and repair media disks — This process scans the media disk surfaces and repairs any errors it finds.
To check and repair the media file system, do the following:
- Open the Storage Utility as explained in "Opening and closing the Storage Utility".
- Select Check & Repair. A progress indicator appears.
- Messages are displayed to report results. Respond to messages as follows:
- When the processes to check for unreferenced movies and unreferenced media files are complete an information message appears to verify any operations performed. Click OK to continue.
- A dialog box appears prompting you to perform a disk surface scan. As explained by the on-screen text, do one of the following:
- When the disk surface scan process completes, an information message appears to verify success. You can find a report of the process at C:\logs\CheckRepairSummary.txt. Click OK to complete the Check and Repair process.
Defragmenting the media disk volume
The media disk volume is the V: drive, which is striped across both SATA drives for performance reasons. This is the only volume that might occasionally need defragmenting. If you are using the Turbo iDDR within recommended usage patterns, the C: drive and the D: drive should not need to be defragmented.
When the V: drive becomes fragmented to the point at which performance could be affected, a prompt appears during Power On Self Test (POST) which informs you that you should defragment. When you see this message, use the following procedure to defragment the V: drive.
To defragment the media disk volume, do the following:
- Open the Storage Utility as explained in "Opening and closing the Storage Utility".
- Select Defrag Media. A progress indicator appears as the Storage Utility checks the disks for defragmentation.
- A message appears informing you of the results of the defragmentation check. Click Yes to defragment the media drives. The process could take several hours.
A message box appears the reports progress.
- When the defrag process completes, an information message appears to verify success. You can find a report of the process at C:\logs\DefragReport.txt. Click OK to complete the defrag process.
Exporting log files
The procedures in this section describe how to export log files from the Turbo iDDR. The log files can include the following:
The exported log files are combined in a ZIP file. The ZIP file can be sent to Thomson Grass Valley product support where they can analyze the logs to determine the operational status of your iDDR.
NOTE: ExportLog does not export StatusPane messages. To capture StatusPane messages, refer to “Copying messages to the clip board” in the Turbo iDDR User Manual.
Use one of the following procedures to export the logs.
Exporting log files from AppCenter workstation
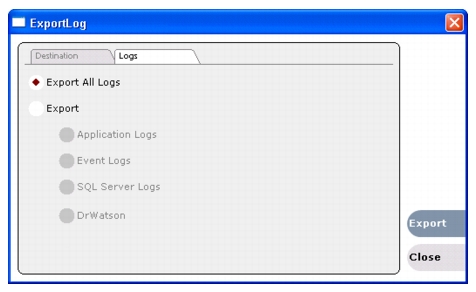
- In AppCenter workstation click System | Export Log. The Export Log dialog box opens.
- Click the Logs tab.

- Browse to a location for saving the log file.
- Name the log file.
- Click Export. A progress bar appears.
- When the export process is complete, and message confirms success. Click OK and close the Export Log dialog box to continue.
- Find the export log file at the specified location.
Exporting log files using the Windows command line
This procedure allows you to export log files even if AppCenter does not start properly. It uses the Windows command prompt.
- If you have not already done so, connect a mouse and keyboard to the iDDR.
- In the Windows task bar, select Start | Run.
- Type the following in the Run dialog box, then click OK.
The ExportLog dialog box is displayed.
- Continue with the procedure "Exporting log files from AppCenter workstation", starting with step 2.
Restoring the default system
The system installer process allows you to return your iDDR to a default state. At a minimum the process replaces the entire system drive, including the Windows operating system. This keeps the iDDR system free from foreign software or files that could compromise performance. However, with the system installer process you do have the option of retaining your existing configurations and media files.
NOTE: The system installer process overwrites all files on the system (C:) drive.
To restore the default Turbo iDDR system, do the following:
- Insert the system installer CD in the iDDR CD drive.
- Restart the iDDR.
- During the black screen boot up process, when prompted to start the system installer CD, press the space bar before the five second countdown expires.
As guided by on-screen messages, wait for the system installer application to open.
- In the system installer application, select one of the following options:
- System Update/Repair — This overwrites the C: drive, which gives you a fresh Windows operating system along with iDDR software. When the Update/Repair process finishes, you must reconfigure any Windows settings, such as networking. Media clips and iDDR configuration files are saved.
- Reset to Factory Condition — This overwrites all data, including all your existing media, currently on the iDDR. This includes the C:, D:, and V: drives.
- A warning message appears that further explains the action for the selected option. Click Yes to continue.
- One or more message boxes appear that report progress. If you selected the Reset option, the system automatically restarts. When the Success message box appears, click OK to restart the iDDR.
- When prompted to start the system installer CD, allow the five second countdown to expire. The iDDR starts up in normal operating mode.
- Remove the system installer CD from the iDDR CD drive.
- If necessary, reconfigure Windows settings.
Replacing an iDDR
To correct some system faults Grass Valley Support sends you a replacement iDDR. Contact Grass Valley Support if you think you need a replacement iDDR.
Determining Turbo iDDR versions
To determine version of software and hardware currently installed on the iDDR, do the following:
In AppCenter workstation, click Help | About AppCenter. A dialog box opens that provides the following version information:
- System Version — This is the Turbo iDDR system software version
- RTS Version — This is the Real Time System version
- Media File System — This is the type and version of file system software that manages the media files.
- Codec Board — This is the model and version of the codec board.
- Database Version — This is the version of the SQL database software for the media database.
|
|
| Copyright Thomson Broadcast and Media Solutions, Inc. |
| http://www.thomsongrassvalley.com |