System disk dual configuration procedure
Read the Dual Disk Configuration Overview before performing this procedure.
Configure the dual disk of the system disk with the following procedure.
Note: To perform this procedure, you need to log on as an administrator
or a member of an administrator group.
-
Go to
Start |
All Programs |
RDR |
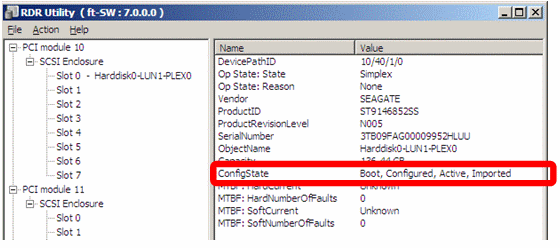
RDR Utility and start the RDR utility. On the
left pane of the RDR utility, select
Slot 0 of PCI module 10 under
SCSI Enclosure and confirm that the
ConfigState on the right pane reports:
Boot,
Configured,
Active,
Imported.
TIPS:
- The RDR Utility display does not refresh automatically. From the menu, go to Action and click Refresh or press the F5 key every time you conduct disk-related operations such as connecting/disconnecting disks or configuring the RDR.
- On the RDR Utility, PCI module names appear as follows. PCI module (CPU/IO module 0) − PCI module 10 PCI module (CPU/IO module 1) − PCI module 11.
Note: Be sure to use new disks or physically formatted ones with the same capacity as the synchronization source disk. If you use other disks, dual configuration will not be correct. - Insert the disk for the dual configuration into Slot 0 of PCI Module 11.
-
Start
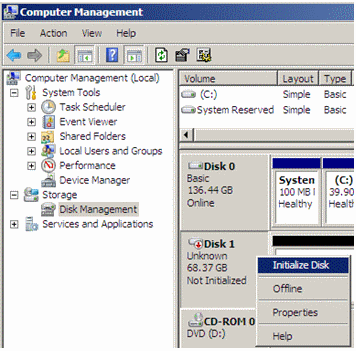
Computer Management by going to
Start |
Administrative Tools and select
Disk Management in the left tree. If the disk
reports
Not Initialized on the right pane, right-click
on the relevant disk to initialize.
IMPORTANT: A popup window prompting you to reboot appears when inserting or initializing the disk; however, you do not need to reboot the system. Select Restart Later to exit the popup window.
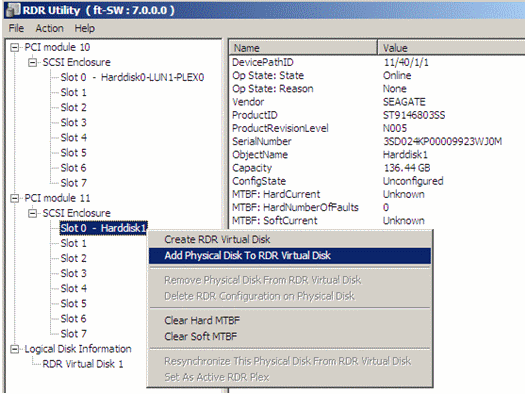
- Right-click on Slot 0 of PCI module 11 from the left pane of the RDR Utility and click Add Physical Disk To RDR Virtual Disk.
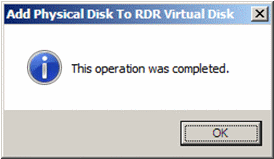
- Click OK.
-
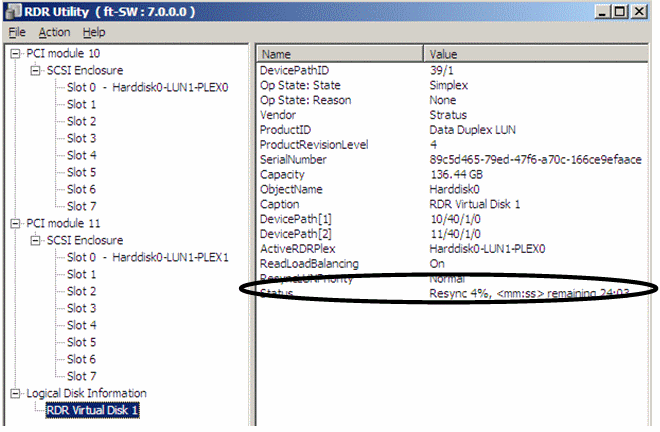
Verify that disk synchronization has been started and the status
of the DISK ACCESS LED and RDR Utility display changes during synchronization
as described in the table and RDR Utility screen below:
IMPORTANT:
During synchronization Disk Access LED RDR Utility Synchronization source disk Amber and blinking Condition: Simplex Status: N/A Synchronization destination disk Amber and blinking Condition: Syncing Status: N/A RDR Virtual disk N/A Condition: Simplex Status: Resync x % (x=0, 4, 8,...96
- The time required for synchronization varies depending on the partition size on the disk. For a 40GB partition, it takes about 50 minutes.
- Setting dual disk configuration may not complete if you reboot the system during the synchronization. Do not reboot the system before the synchronization process completes.
- If the system stops by terminating Windows improperly such as pressing the Power button, the whole disk area already synchronized will be resynchronized after rebooting the system.
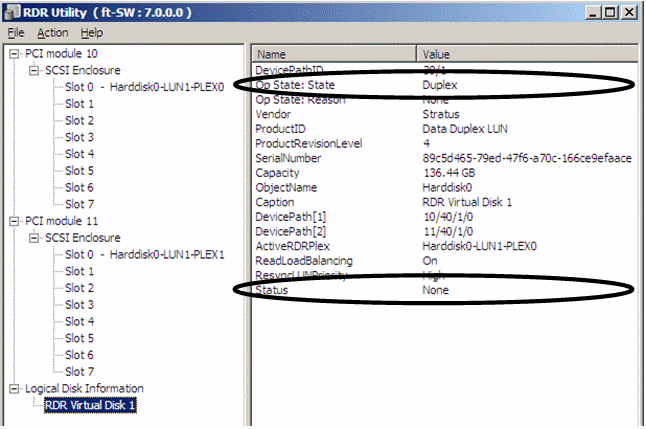
Verify that disk synchronization is complete by noting that the status of the DISK ACCESS LED and RDR Utility display change as described in the table and RDR Utility screen below:

